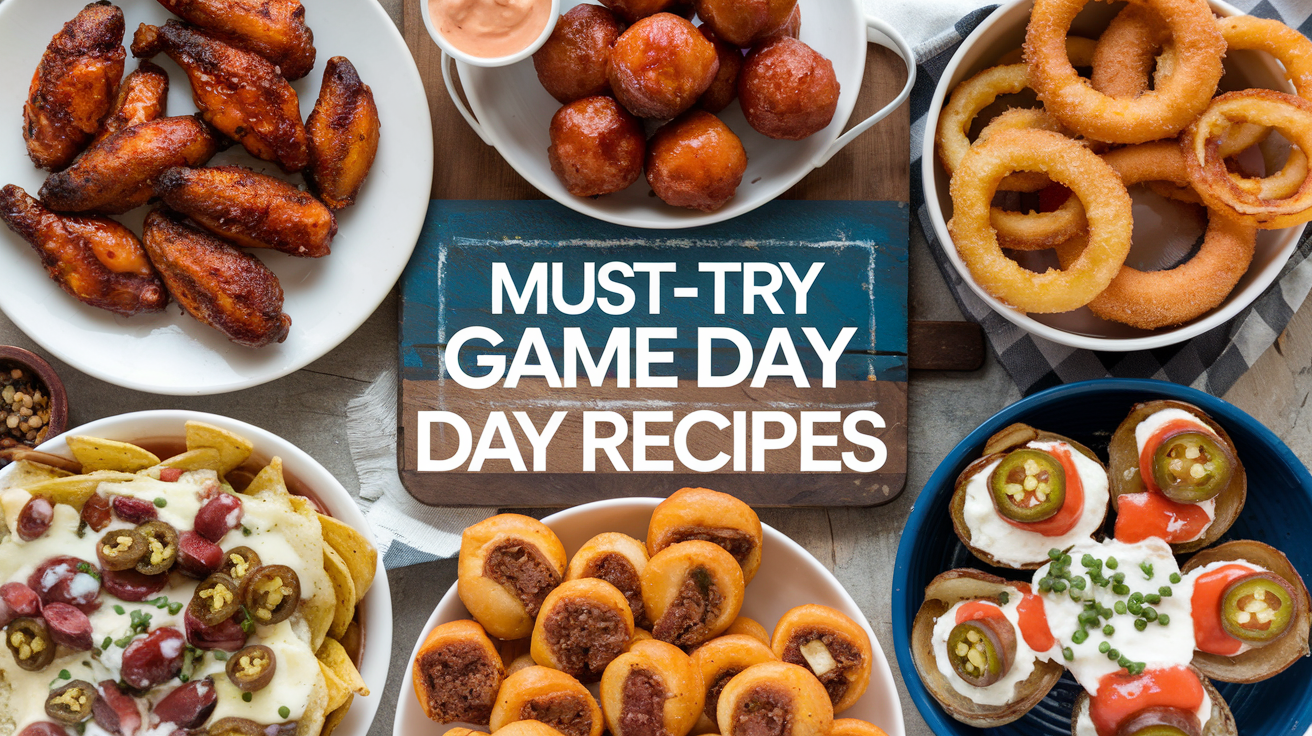
Game day is the perfect excuse to whip up some fun and tasty bites that’ll keep everyone fueled and happy while cheering for your favorite team. From classic finger foods to creative snacks, these recipes will make your watch party a hit. Get ready to impress your guests with delicious dishes that are easy to prepare and even easier to enjoy!
Stuffed Jalapeño Poppers
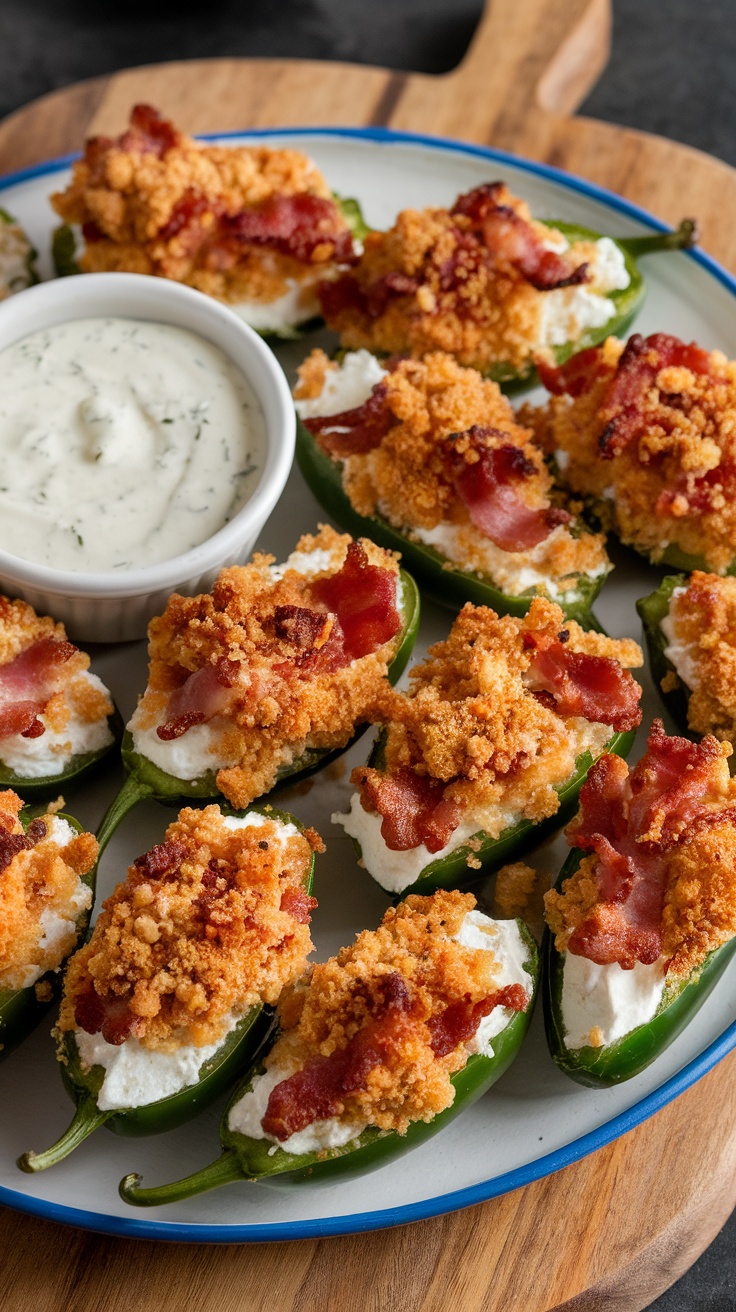
Stuffed jalapeño poppers make for a fantastic game day snack. These little bites pack a punch of flavor with their creamy filling, crispy topping, and a hint of spice from the jalapeño. They’re sure to please any crowd!
This recipe is simple to whip up, requiring minimal ingredients and effort. Just stuff, bake, and enjoy the crispy, cheesy goodness paired with a cool dipping sauce.
Ingredients
- 12 fresh jalapeños
- 8 oz cream cheese, softened
- 1 cup shredded cheddar cheese
- 1/2 cup cooked bacon, crumbled
- 1 cup breadcrumbs
- 1 tablespoon olive oil
- 1 teaspoon garlic powder
- Salt and pepper to taste
Instructions
- Preheat your oven to 375°F (190°C).
- Slice the jalapeños in half lengthwise and remove the seeds and membranes for less heat.
- In a bowl, mix the cream cheese, cheddar cheese, crumbled bacon, garlic powder, salt, and pepper until well combined.
- Stuff each jalapeño half with the cheese mixture.
- In another bowl, mix the breadcrumbs with olive oil, then sprinkle on top of the stuffed jalapeños.
- Place on a baking sheet and bake for 20-25 minutes until the tops are golden and crispy.
- Serve warm with your favorite dipping sauce!
Zesty Guacamole with Tortilla Chips
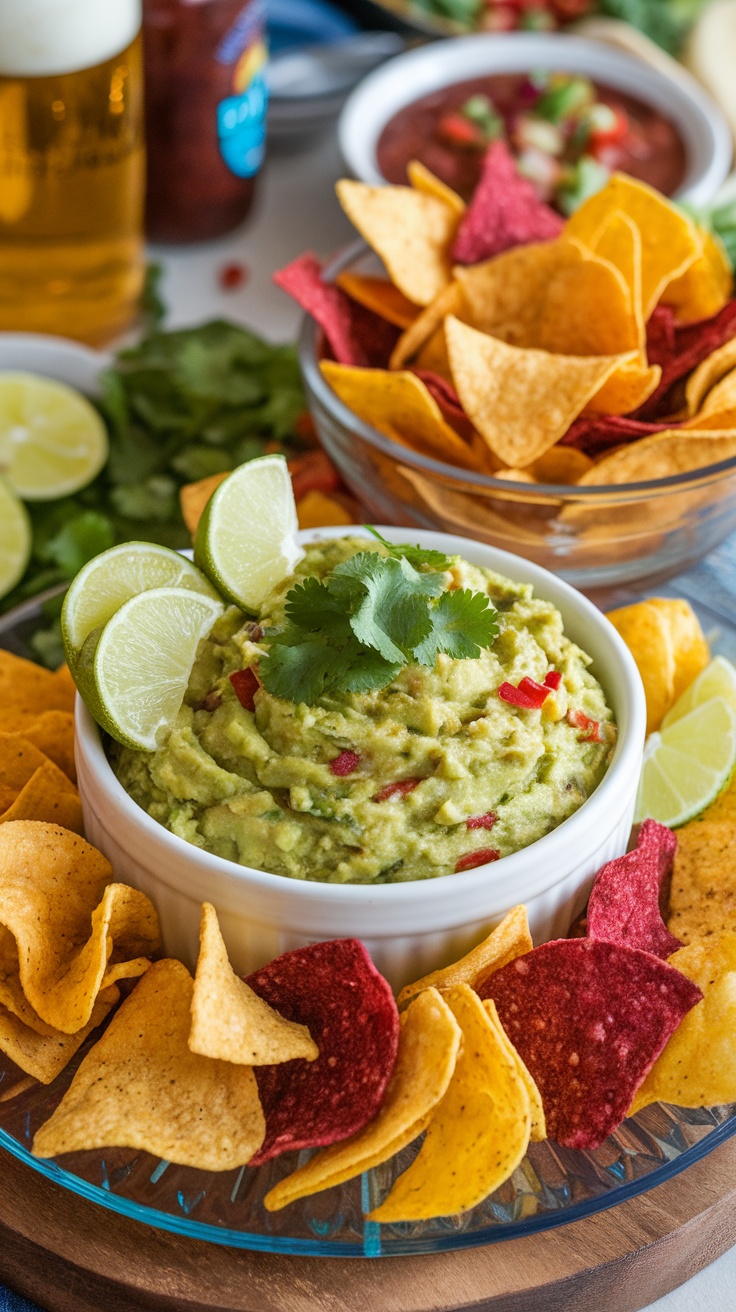
Get ready to bring some flair to your game day spread with this zesty guacamole! This dip is not only creamy and delicious but also super easy to whip up. Combining ripe avocados with tangy lime juice, fresh cilantro, and a hint of spice creates a flavor explosion that pairs perfectly with crunchy tortilla chips.
Whether you’re hosting friends for the big game or simply enjoying a relaxing day at home, this guacamole is a crowd-pleaser. It’s fresh, vibrant, and just the right amount of zesty. Plus, you can customize it to your liking by adding jalapeños for a kick or tomatoes for sweetness. Dive into this refreshing dip, and watch it disappear!
Ingredients
- 3 ripe avocados
- 1 medium lime, juiced
- 1 small red onion, finely chopped
- 1 small tomato, diced
- 1/4 cup fresh cilantro, chopped
- 1-2 cloves garlic, minced
- Salt, to taste
- Freshly ground black pepper, to taste
- Tortilla chips, for serving
Instructions
- Prepare the Avocados: Cut the avocados in half, remove the pits, and scoop the flesh into a bowl.
- Mash and Mix: Use a fork to mash the avocados to your desired level of creaminess. Stir in lime juice, red onion, tomato, cilantro, garlic, salt, and pepper.
- Taste and Adjust: Give it a taste and adjust the seasoning with more salt, lime juice, or garlic according to your preference.
- Serve: Transfer the guacamole to a serving bowl and garnish with extra cilantro if desired. Serve with tortilla chips and enjoy!
Classic Deviled Eggs with Paprika
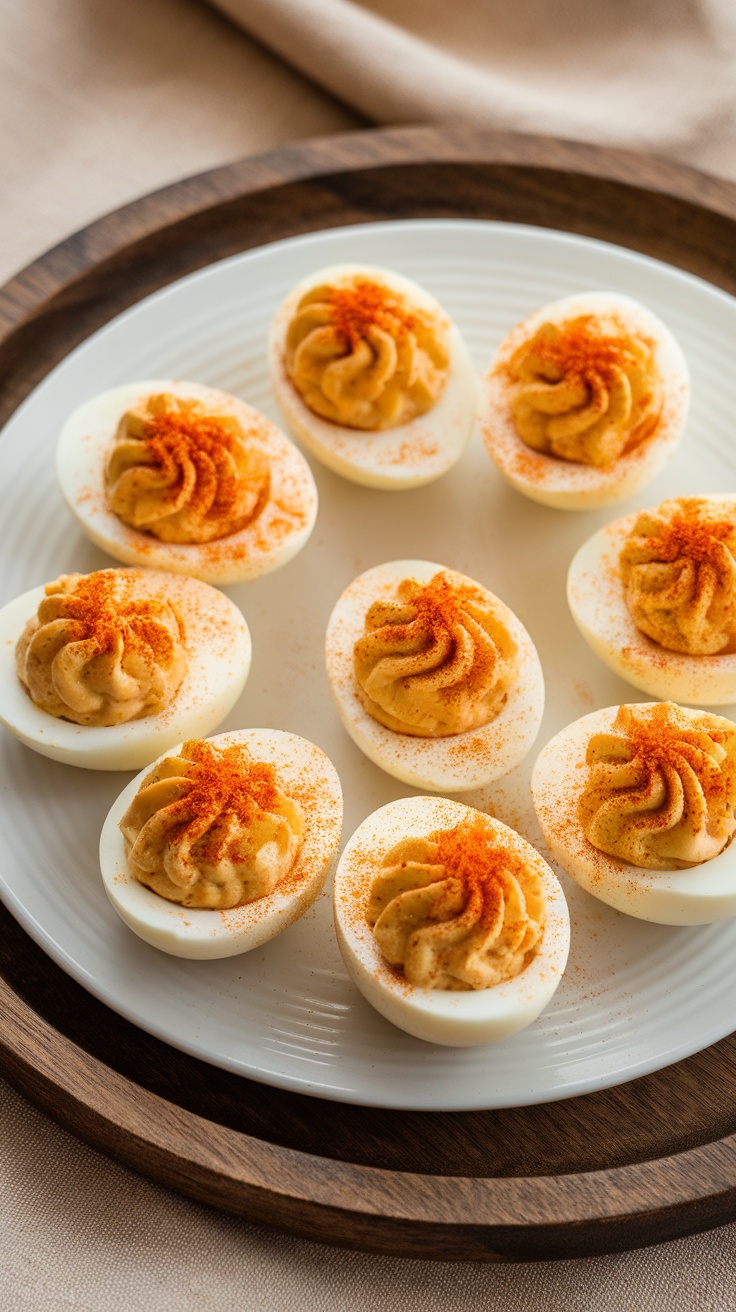
Deviled eggs are a timeless appetizer that never fails to impress. These bite-sized delights combine the creamy richness of egg yolks with a touch of tanginess, making them a crowd favorite. They’re simple to prepare, and with just a few ingredients, you can create a dish that’s both elegant and flavorful.
The addition of paprika not only enhances the taste but also adds a pop of color. Perfect for game day gatherings, these classic deviled eggs are a sure way to keep your guests coming back for more!
Ingredients
- 6 large eggs
- 1/4 cup mayonnaise
- 1 teaspoon Dijon mustard
- 1 teaspoon white vinegar
- Salt and pepper to taste
- Paprika for garnish
Instructions
- Hard Boil the Eggs: Place eggs in a pot and cover with water. Bring to a boil, then remove from heat and cover for 12 minutes. Transfer eggs to ice water to cool.
- Peel and Cut: Once cool, peel the eggs and slice them in half lengthwise. Remove the yolks and place them in a bowl.
- Mix the Filling: Mash the yolks with mayonnaise, Dijon mustard, white vinegar, salt, and pepper until smooth.
- Fill the Eggs: Spoon or pipe the yolk mixture back into the egg whites.
- Garnish: Lightly sprinkle paprika on top of each filled egg for a finishing touch.
- Serve and Enjoy: Chill in the refrigerator before serving to let the flavors meld.
Savory Spinach and Artichoke Dip
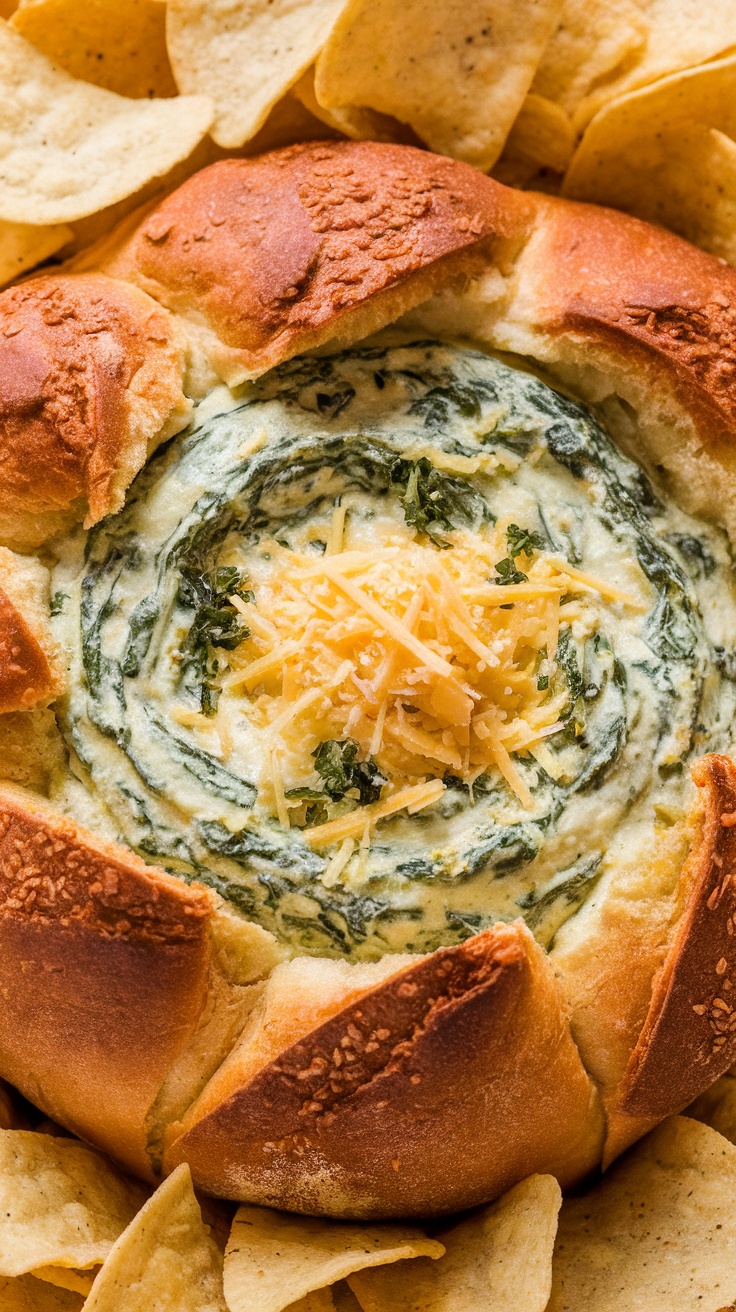
This Spinach and Artichoke Dip is a classic crowd-pleaser that’s perfect for game day. Creamy, cheesy, and packed with flavor, it’s the ultimate snack to enjoy while cheering on your favorite team. The combination of spinach and artichokes creates a deliciously rich taste that pairs well with crunchy tortilla chips or toasted bread.
Plus, this recipe is super simple to make. With just a few ingredients and some quick prep, you can have a warm, comforting dish ready in no time. Everyone will be coming back for more!
Ingredients
- 1 cup fresh spinach, chopped
- 1 can (14 oz) artichoke hearts, drained and chopped
- 1 cup cream cheese, softened
- 1/2 cup sour cream
- 1/2 cup mayonnaise
- 1 cup shredded mozzarella cheese
- 1/2 cup grated Parmesan cheese
- 2 cloves garlic, minced
- 1/2 teaspoon salt
- 1/4 teaspoon black pepper
- 1/4 teaspoon red pepper flakes (optional)
Instructions
- Preheat your oven to 350°F (175°C).
- In a large mixing bowl, combine the cream cheese, sour cream, and mayonnaise. Mix until smooth.
- Add the chopped spinach, artichoke hearts, mozzarella cheese, Parmesan cheese, minced garlic, salt, black pepper, and red pepper flakes (if using). Stir until everything is well combined.
- Transfer the mixture into a baking dish and spread evenly.
- Bake for 25-30 minutes, or until the dip is bubbly and golden on top.
- Serve warm with tortilla chips or toasted bread for dipping.
Crispy Parmesan Garlic Fries
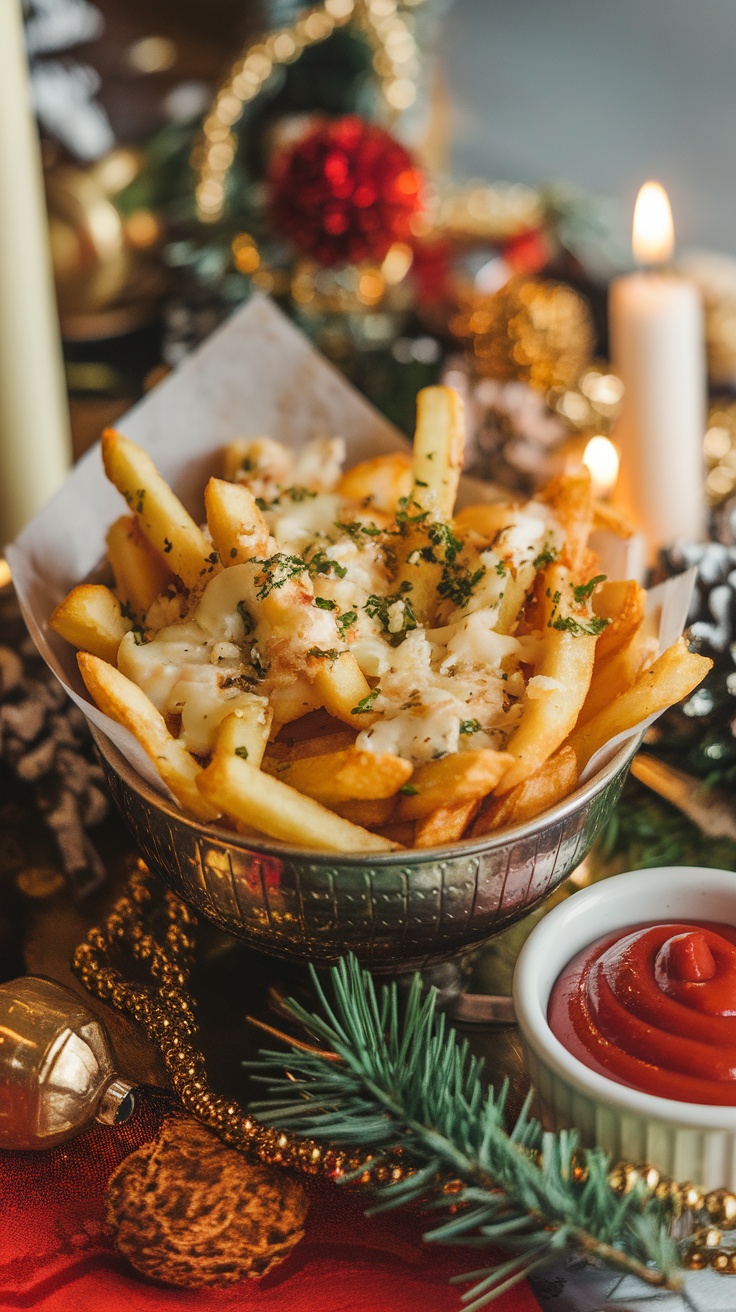
These Crispy Parmesan Garlic Fries are the ultimate game day snack! Golden and crunchy, they are topped with a savory blend of garlic and Parmesan cheese that adds a delightful twist to traditional fries. Perfect for sharing while cheering on your favorite team, these fries are simple to make and packed with flavor.
The irresistible combination of crispy texture and cheesy goodness makes these fries a must-have at any gathering. Paired with your favorite dipping sauce, they are sure to be a hit at the party!
Ingredients
- 4 large russet potatoes
- 1/4 cup olive oil
- 3-4 cloves garlic, minced
- 1/2 cup grated Parmesan cheese
- 1 teaspoon garlic powder
- Salt and pepper to taste
- Chopped parsley for garnish
Instructions
- Preheat your oven to 425°F (220°C) and line a baking sheet with parchment paper.
- Wash and cut the potatoes into thin fries. Soak them in cold water for about 30 minutes to help remove excess starch, then drain and pat dry.
- In a large bowl, toss the fries with olive oil, minced garlic, garlic powder, salt, and pepper until well coated.
- Spread the fries evenly on the prepared baking sheet and bake for about 25-30 minutes, flipping halfway through, until golden and crispy.
- Once out of the oven, sprinkle the hot fries with grated Parmesan cheese and toss gently to combine. Garnish with chopped parsley and serve with your favorite dipping sauce.
BBQ Pulled Pork Sliders
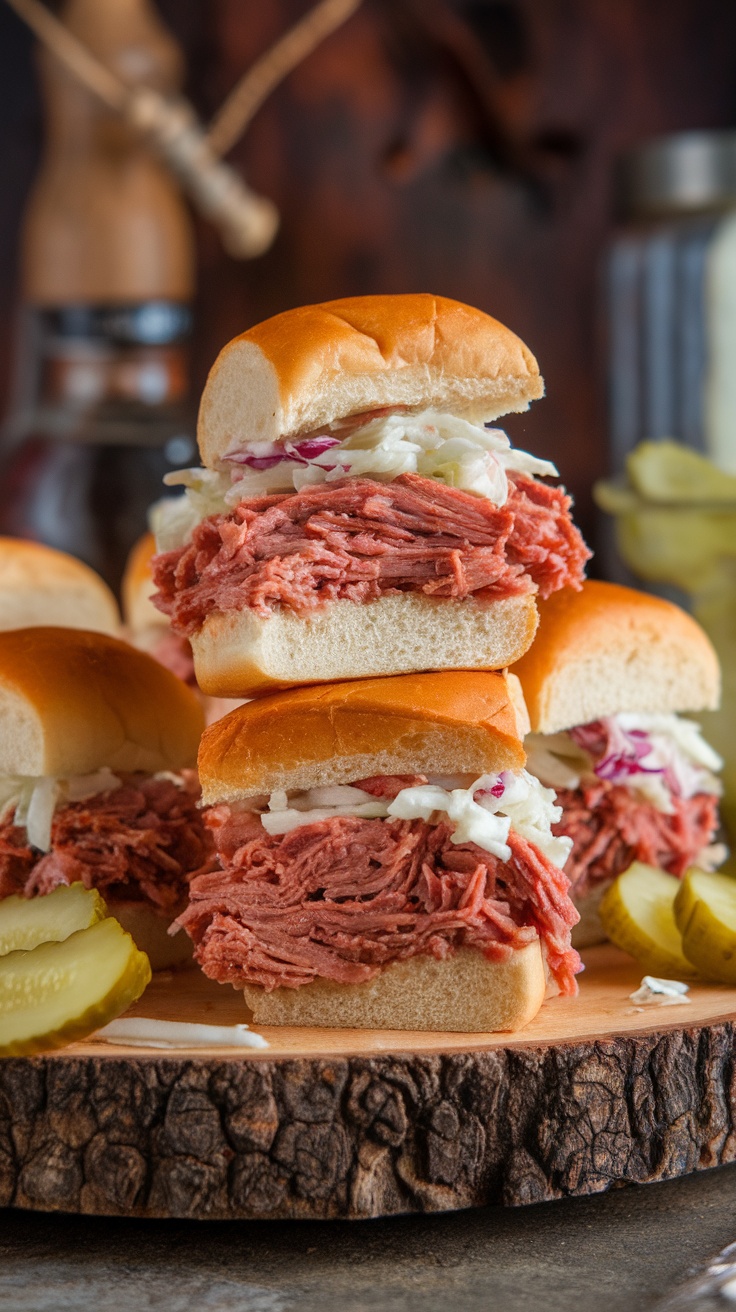
BBQ pulled pork sliders are perfect for game day gatherings, blending tender, flavorful pork with tangy barbecue sauce. These little sandwiches pack a punch of flavor and are super easy to prepare, making them a hit with friends and family.
The combination of juicy pulled pork, soft slider buns, and crunchy coleslaw creates a delightful contrast. Serve them with pickles on the side for added tang, and you have a meal that everyone will enjoy!
Ingredients
- 3-4 pounds pork shoulder
- 1 tablespoon smoked paprika
- 1 teaspoon garlic powder
- 1 teaspoon onion powder
- Salt and pepper to taste
- 1 cup BBQ sauce
- 12 slider buns
- 1 cup coleslaw mix
- 1/2 cup coleslaw dressing
Instructions
- Prepare the Pork: Rub the pork shoulder with smoked paprika, garlic powder, onion powder, salt, and pepper. Place it in a slow cooker.
- Cook the Pork: Add a splash of water or additional BBQ sauce to the slow cooker. Cover and cook on low for 8 hours or until the pork is tender and easily shreds with a fork.
- Shred the Pork: Remove the pork from the slow cooker and shred it using two forks. Return it to the slow cooker and mix with BBQ sauce to coat the meat.
- Prepare the Slaw: In a bowl, combine the coleslaw mix with coleslaw dressing. Mix well.
- Assemble the Sliders: Place a generous amount of pulled pork on each slider bun, top with coleslaw, and serve warm.
Spicy Buffalo Chicken Wings
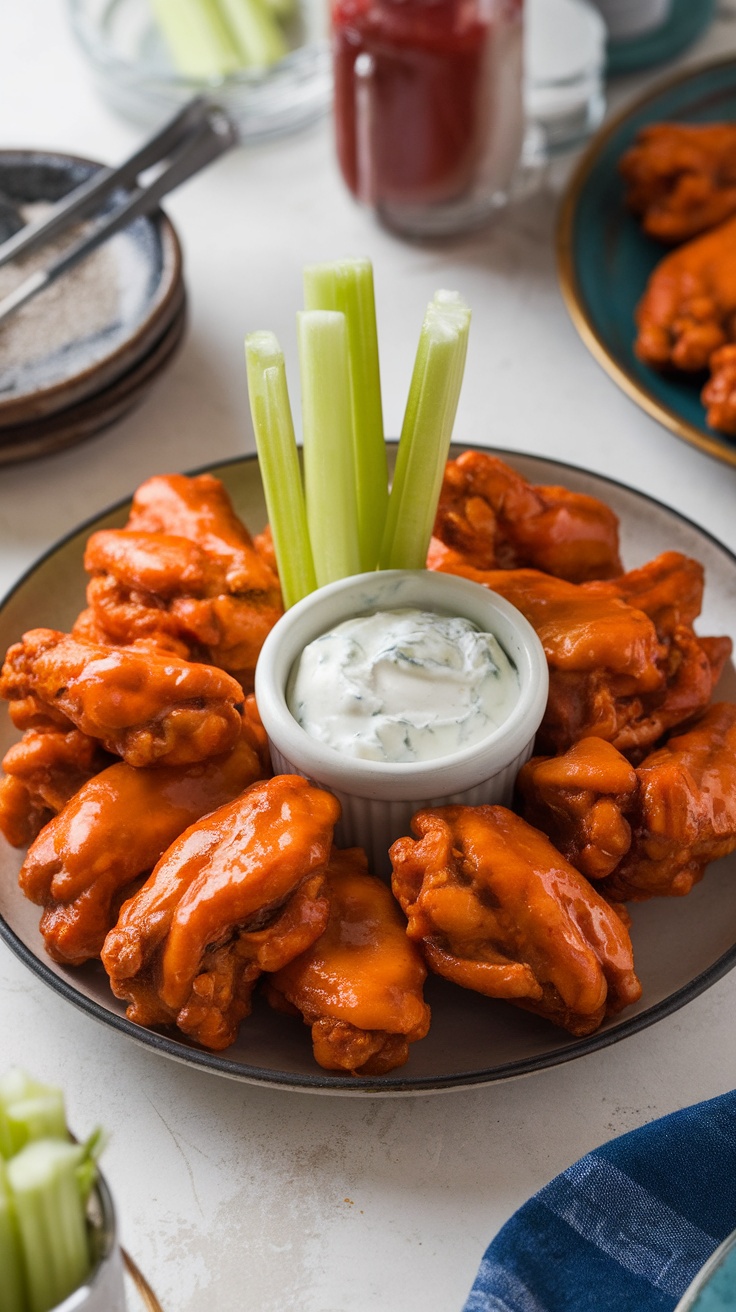
Spicy Buffalo Chicken Wings are a classic game day treat that packs a fiery punch. These wings are crispy on the outside, tender on the inside, and covered in a tangy, spicy sauce that will leave your taste buds dancing. They’re easy to make and always a crowd-pleaser, making them perfect for watching the big game with friends.
The combination of heat from the sauce and the cooling effect of dipping them in ranch or blue cheese dressing creates a delightful balance. Plus, they pair perfectly with crunchy celery sticks. Get ready to have everyone reaching for seconds!
Ingredients
- 2 pounds chicken wings
- 1/2 cup hot sauce (like Frank’s RedHot)
- 1/4 cup unsalted butter, melted
- 1 tablespoon white vinegar
- 1 teaspoon garlic powder
- 1/2 teaspoon salt
- 1/2 teaspoon black pepper
- Celery sticks, for serving
- Ranch or blue cheese dressing, for dipping
Instructions
- Preheat the Oven: Preheat your oven to 400°F (200°C) and line a baking sheet with aluminum foil. Place a wire rack on top.
- Prepare the Wings: Pat the chicken wings dry with paper towels. This helps them get crispy. In a large bowl, toss the wings with salt, pepper, and garlic powder.
- Bake the Wings: Arrange the wings in a single layer on the wire rack. Bake for 40-45 minutes, flipping them halfway through, until they are crispy and golden brown.
- Make the Sauce: While the wings are baking, combine the hot sauce, melted butter, and white vinegar in a bowl. Stir until well mixed.
- Coat the Wings: Once the wings are done baking, transfer them to a large bowl and pour the sauce over them. Toss until the wings are fully coated.
- Serve: Plate the wings with celery sticks and your choice of dipping sauce. Enjoy your spicy Buffalo chicken wings!
Loaded Nachos with Jalapeños
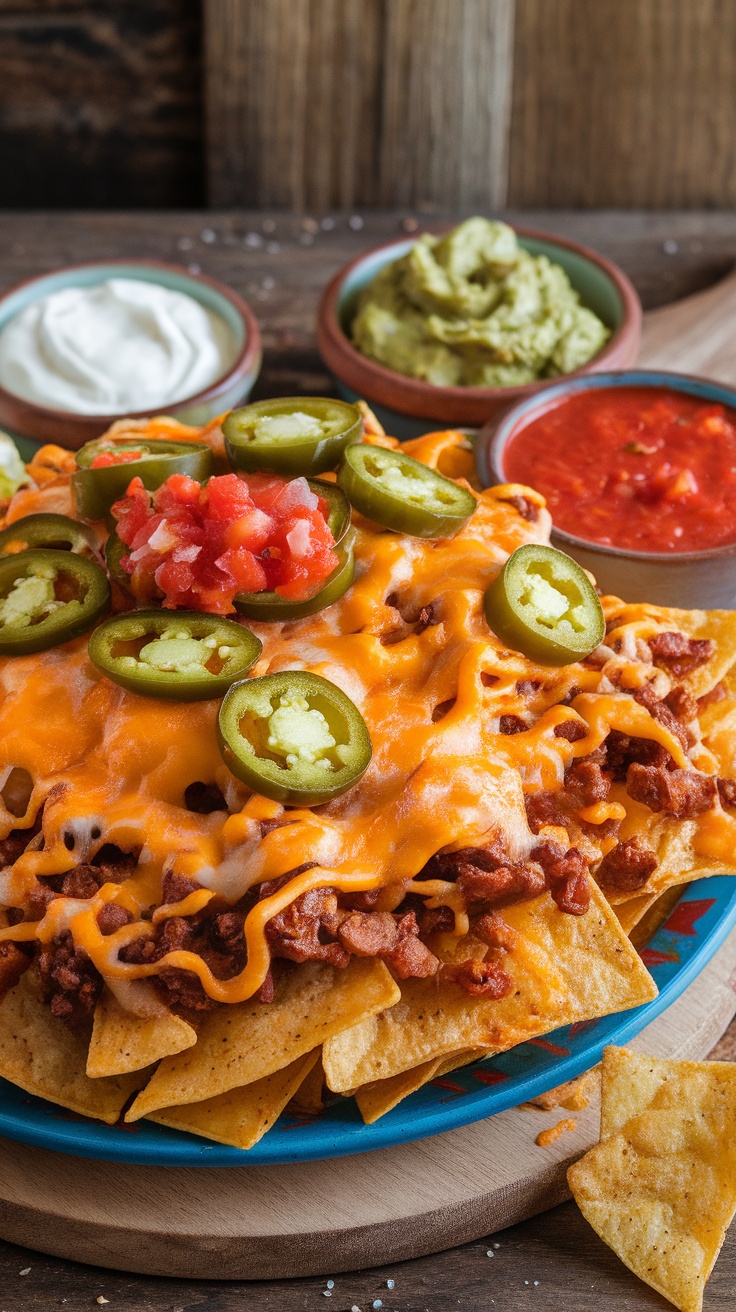
Loaded nachos with jalapeños are a perfect addition to any game day gathering. These flavorful bites combine crispy tortilla chips with melted cheese, savory toppings, and a kick of heat from fresh jalapeños. It’s an easy recipe that allows you to customize ingredients according to your taste, making it a hit with family and friends.
The combination of gooey cheese, hearty toppings, and zesty jalapeños creates a delightful explosion of flavors in every bite. Whether you’re watching the big game or hosting a casual get-together, these nachos are sure to satisfy your cravings and keep everyone coming back for more.
Ingredients
- 1 bag of tortilla chips
- 2 cups shredded cheddar cheese
- 1 cup cooked ground beef or chicken
- 1 can refried beans (optional)
- 1/2 cup sliced jalapeños
- 1/2 cup diced tomatoes
- 1/4 cup sliced black olives (optional)
- 1/4 cup sour cream (for serving)
- 1/4 cup guacamole (for serving)
- 1/4 cup salsa (for serving)
Instructions
- Preheat your oven to 350°F (175°C).
- Spread tortilla chips evenly on a baking sheet. If using refried beans, spread them over the chips first.
- Layer the cooked meat over the chips, followed by the shredded cheese, jalapeños, and diced tomatoes.
- Bake in the preheated oven for 10-15 minutes, or until the cheese is melted and bubbly.
- Remove from the oven, garnish with black olives if desired, and serve immediately with sour cream, guacamole, and salsa on the side.
Bacon-Wrapped Meatballs
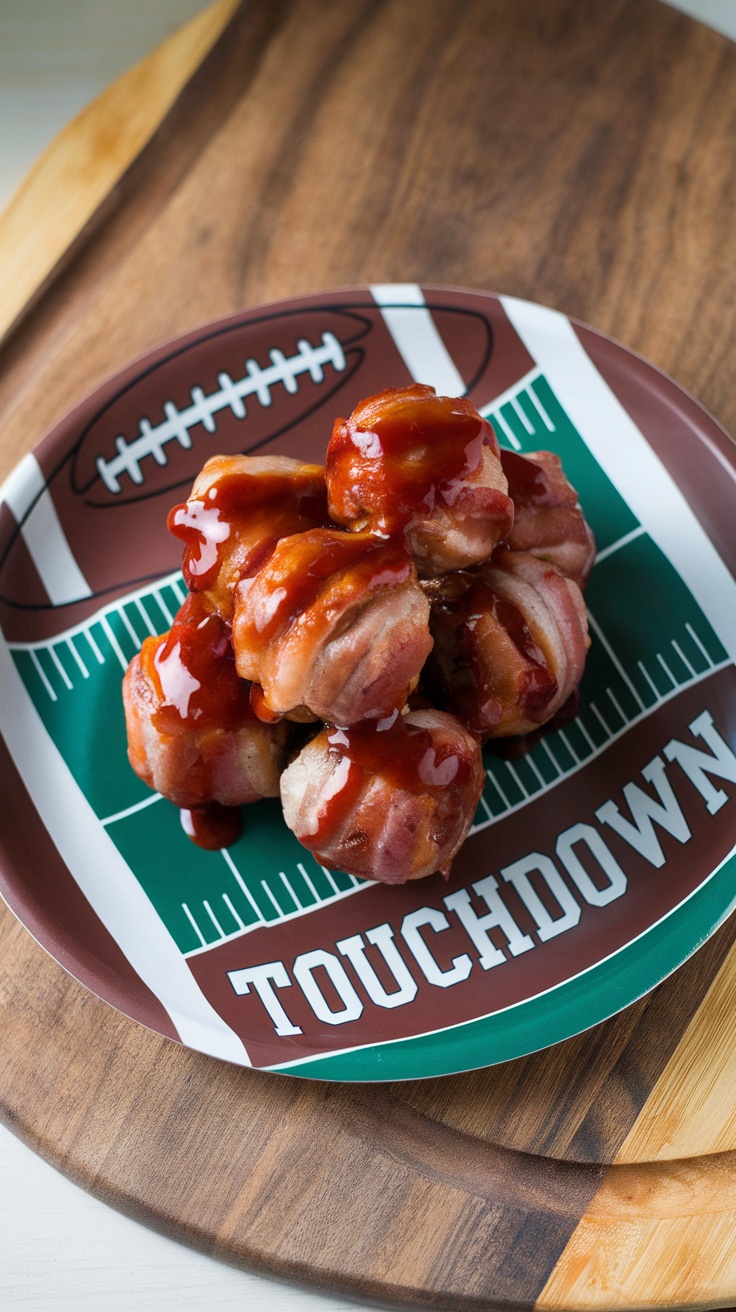
Bacon-wrapped meatballs are a winning combination that’s perfect for game day. Juicy meatballs are enveloped in crispy bacon, creating a flavor explosion that will have everyone reaching for more. Whether you’re hosting a big party or just enjoying a quiet night in, these bites are sure to impress with their savory taste and satisfying crunch.
The best part? They’re simple to make! Just wrap, bake, and serve with your favorite dipping sauce. These meatballs are an all-time favorite that pairs beautifully with the excitement of game day.
Ingredients
- 1 pound ground beef
- 1/2 pound ground pork
- 1/2 cup breadcrumbs
- 1/4 cup grated Parmesan cheese
- 1/4 cup chopped fresh parsley
- 1 large egg
- 1 teaspoon garlic powder
- 1 teaspoon onion powder
- Salt and pepper to taste
- 12-15 strips of bacon
- BBQ sauce for drizzling
Instructions
- Preheat your oven to 400°F (200°C).
- In a large bowl, combine ground beef, ground pork, breadcrumbs, Parmesan, parsley, egg, garlic powder, onion powder, salt, and pepper. Mix until well combined.
- Shape the mixture into meatballs, about 1-1.5 inches in diameter.
- Cut each strip of bacon in half. Wrap each meatball with a half strip of bacon, securing with a toothpick if necessary.
- Place the wrapped meatballs on a baking sheet lined with parchment paper. Bake for 20-25 minutes, or until the bacon is crispy and the meatballs are cooked through.
- Remove from the oven and drizzle with BBQ sauce before serving.
Pepperoni Pizza Skewers
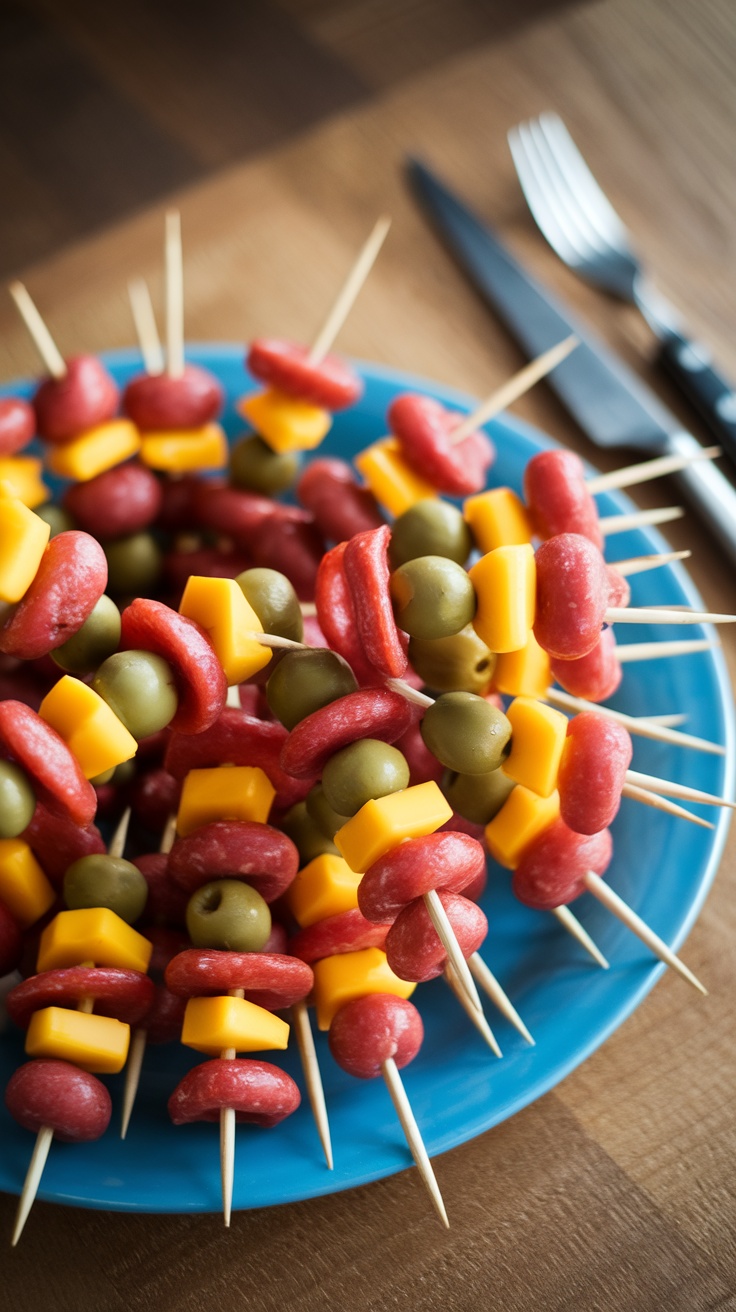
Pepperoni Pizza Skewers are a fun and tasty way to enjoy all the flavors of pizza without the mess of traditional slices. These skewers combine savory pepperoni, gooey cheese, and other tasty ingredients for a bite-sized treat that everyone will love. Perfect for game day, they’re easy to assemble and even easier to eat, making them a hit at any gathering.
The vibrant colors and flavors make these skewers not just delicious, but also visually appealing. With just a few simple ingredients, you can whip these up in no time, allowing you to spend more time enjoying the game and less time in the kitchen.
Ingredients
- 8 oz pepperoni slices
- 8 oz cheddar cheese, cubed
- 1 cup cherry tomatoes
- 1 cup green olives
- 1/2 cup Italian dressing
- Wooden skewers
Instructions
- Prepare the Skewers: Take a wooden skewer and start by threading a piece of pepperoni, followed by a cube of cheddar cheese, a cherry tomato, and an olive.
- Repeat until the skewer is filled: Continue to alternate the ingredients until the skewer is filled, leaving some space at the bottom for handling.
- Marinate (optional): If desired, drizzle Italian dressing over the assembled skewers and let them sit for about 15 minutes to soak in some extra flavor.
- Serve: Arrange the skewers on a platter and serve immediately, or keep them chilled until you’re ready to enjoy.
Vegetable Platter with Hummus Dip
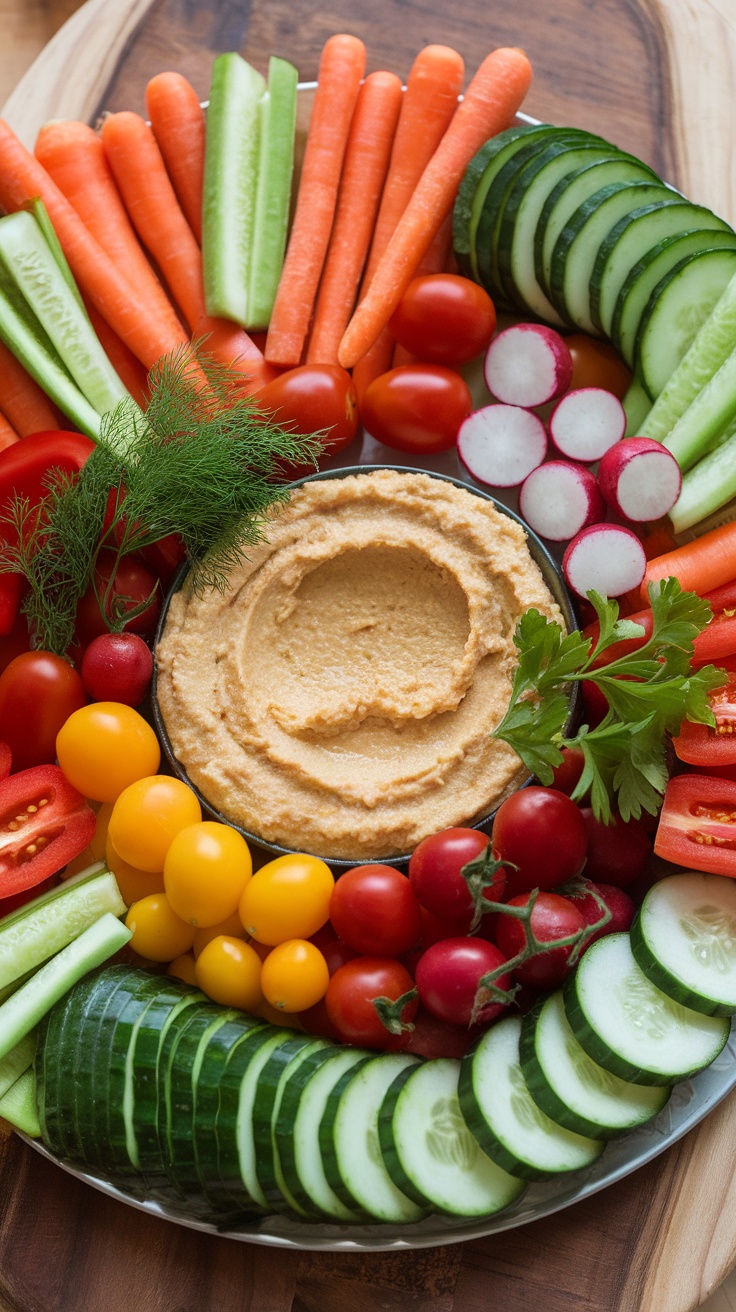
This vegetable platter with hummus dip is a tasty and colorful addition to any game day spread. It’s fresh, crunchy, and packed with flavor, making it perfect for snacking while watching the big game. Preparing this dish is simple, and it can be customized with your favorite veggies and hummus flavors.
The vibrant array of vegetables not only looks appealing but also offers a variety of textures and tastes. Pairing them with creamy hummus creates a delightful contrast that everyone will enjoy. Plus, it’s a healthy option that keeps the energy up without weighing you down!
Ingredients
- 2 cups baby carrots
- 1 cucumber, sliced
- 1 bell pepper, sliced
- 1 cup cherry tomatoes
- 1 cup radishes, halved
- 2 celery stalks, sliced
- 1 cup hummus (store-bought or homemade)
- Fresh herbs for garnish (like parsley or dill)
Instructions
- Prepare the Vegetables: Wash and cut all the vegetables into bite-sized pieces. Arrange them in a circle on a large serving platter for an eye-catching display.
- Make the Hummus: If you’re making hummus at home, blend chickpeas, tahini, lemon juice, garlic, and olive oil until smooth. Adjust seasoning to taste.
- Create the Platter: Place a bowl of hummus in the center of the vegetable arrangement. Add fresh herbs around the platter for a pop of color.
- Serve: Enjoy the vegetable platter with hummus dip as a healthy and tasty snack during the game!
Hearty Chili with Beans and Ground Beef
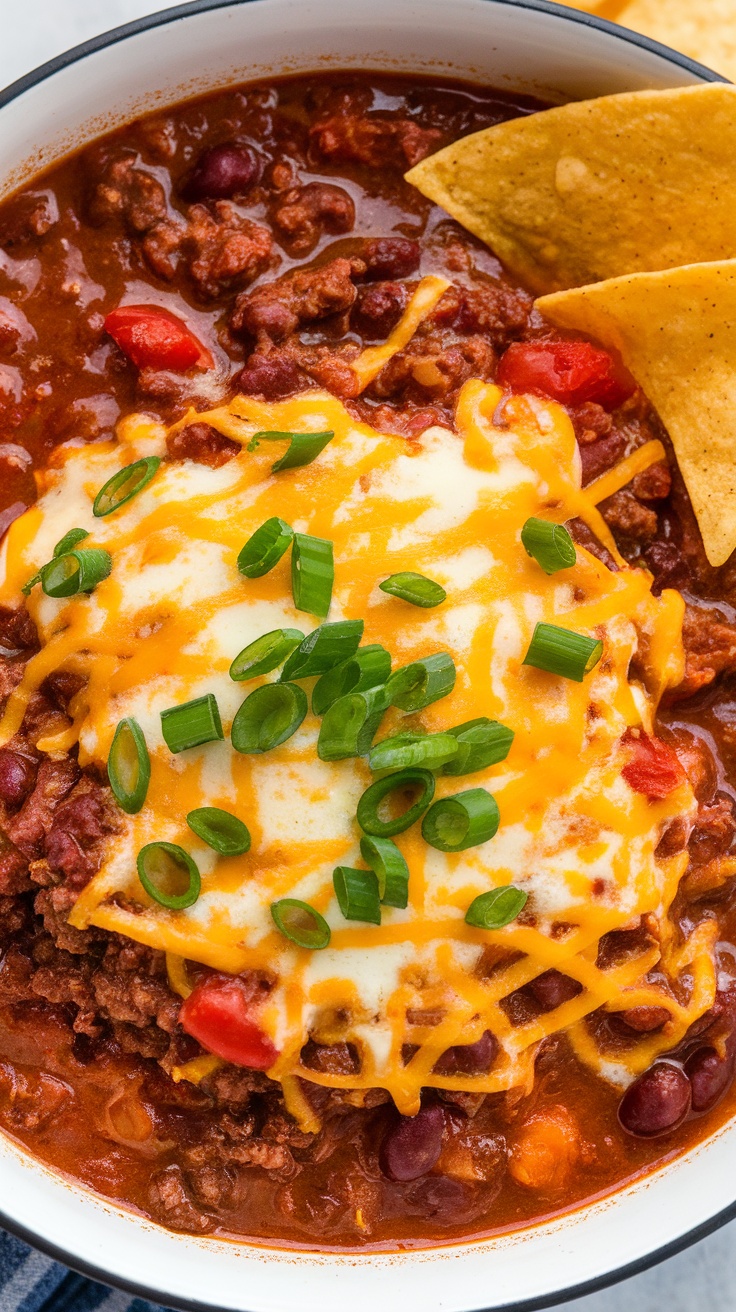
Hearty chili with beans and ground beef is a classic dish that brings warmth and comfort, making it a perfect choice for game day gatherings. It’s rich, flavorful, and packed with protein, ensuring everyone will leave satisfied. Plus, it’s simple to whip up, allowing you to focus on the game and company.
This chili combines ground beef with kidney and black beans, mixed with spices and tomatoes for a deliciously hearty meal. Top it off with cheese and green onions for extra flavor. Whether it’s your first time making chili or you’re a seasoned pro, this recipe is a crowd-pleaser that won’t disappoint!
Ingredients
- 1 pound ground beef
- 1 can (15 oz) kidney beans, drained and rinsed
- 1 can (15 oz) black beans, drained and rinsed
- 1 can (28 oz) crushed tomatoes
- 1 medium onion, chopped
- 2 cloves garlic, minced
- 2 tablespoons chili powder
- 1 teaspoon cumin
- 1 teaspoon salt
- 1/2 teaspoon pepper
- 1 cup shredded cheddar cheese
- 2 green onions, sliced
- Tortilla chips for serving
Instructions
- In a large pot, brown the ground beef over medium heat until fully cooked. Drain excess fat.
- Add chopped onion and minced garlic to the pot. Cook until softened, about 3-4 minutes.
- Stir in the chili powder, cumin, salt, and pepper. Cook for another minute until fragrant.
- Add the kidney beans, black beans, and crushed tomatoes. Stir well to combine.
- Bring the mixture to a simmer and let it cook for about 20 minutes, stirring occasionally.
- Serve hot, topped with shredded cheddar cheese and sliced green onions, with tortilla chips on the side.
Sweet and Spicy BBQ Chicken Bites
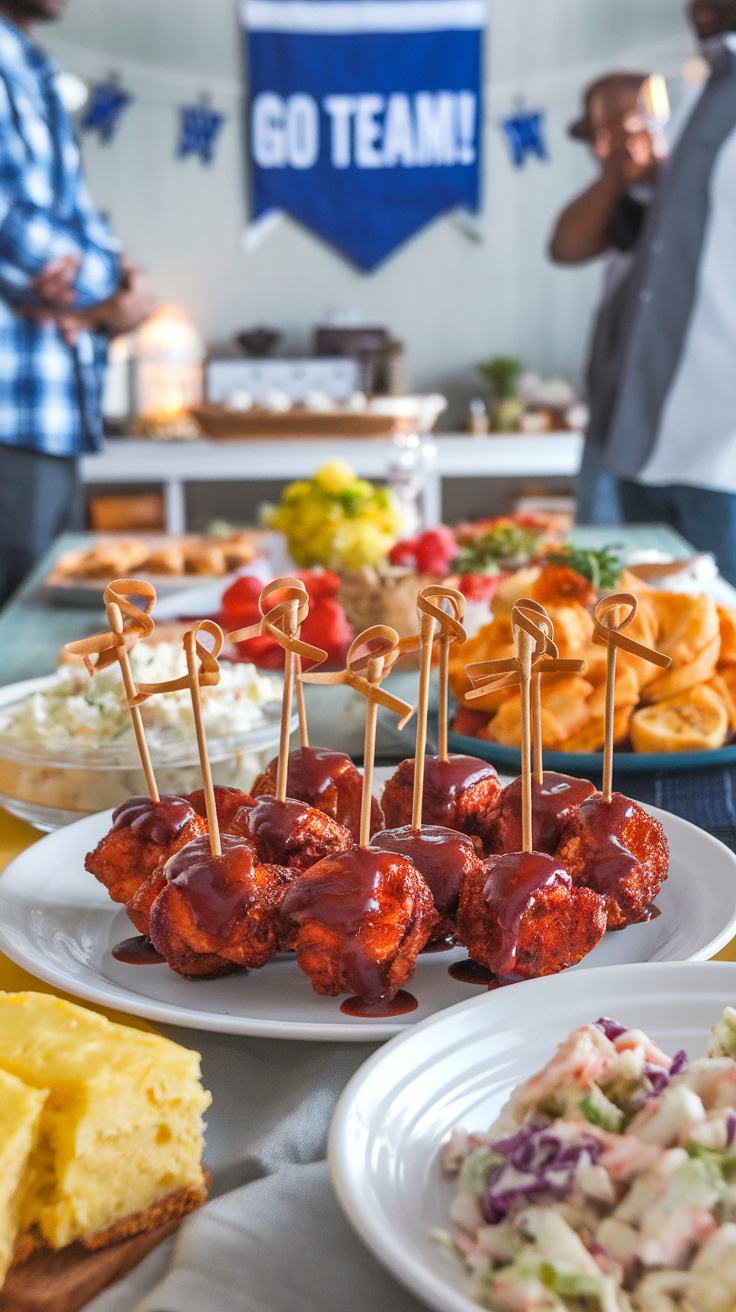
These Sweet and Spicy BBQ Chicken Bites are a must-try for any game day gathering. They bring a perfect balance of heat and sweetness that will keep everyone coming back for more. Easy to prepare and packed with flavor, these bites are sure to impress your friends and family.
The chicken is tender and juicy, coated in a delicious BBQ sauce that’s both sweet and has a kick. Whether served as an appetizer or a main dish, they are perfect for sharing, making them an ideal addition to your game day menu. Here’s how to make them!
Ingredients
- 1 pound boneless chicken breast, cut into bite-sized pieces
- 1 cup BBQ sauce
- 1/4 cup honey
- 2 tablespoons hot sauce (adjust to taste)
- 1 teaspoon garlic powder
- 1 teaspoon onion powder
- 1/2 teaspoon smoked paprika
- Salt and pepper to taste
- Cooking spray or oil for greasing
Instructions
- Preheat your oven to 400°F (200°C) and grease a baking sheet with cooking spray or oil.
- In a bowl, mix the BBQ sauce, honey, hot sauce, garlic powder, onion powder, smoked paprika, salt, and pepper.
- Add the chicken pieces to the bowl and toss until they are evenly coated with the sauce.
- Spread the coated chicken pieces on the prepared baking sheet in a single layer.
- Bake in the preheated oven for 20-25 minutes, or until the chicken is cooked through and begins to caramelize.
- Remove from the oven and let them cool slightly before serving. Enjoy your delicious Sweet and Spicy BBQ Chicken Bites!
Herbed Cheese and Charcuterie Board
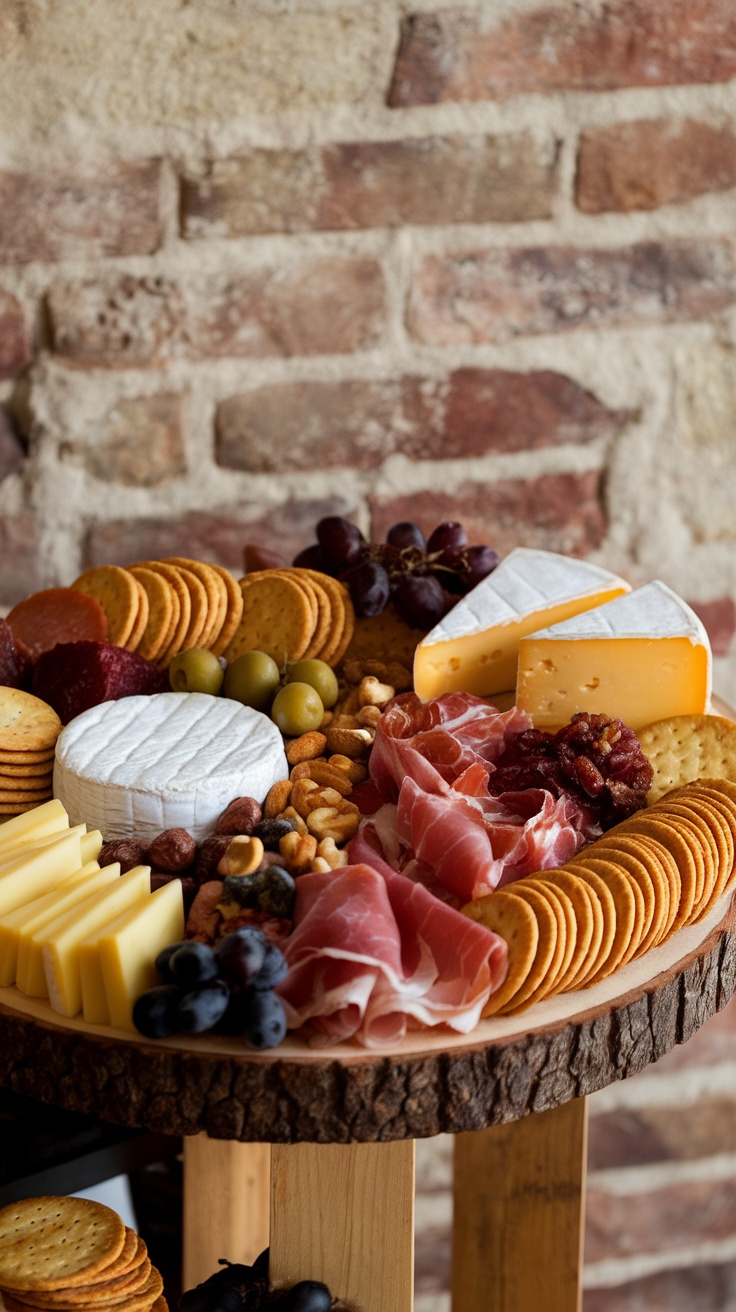
This herbed cheese and charcuterie board is a delightful option for game day gatherings. It combines a variety of cheeses, cured meats, and colorful accompaniments, making it both tasty and visually appealing. The flavors range from creamy to savory, offering something for everyone and making it a breeze to prepare.
Assembling a charcuterie board can be as simple as selecting your favorite ingredients and arranging them artfully. Pairing different textures and flavors is key, ensuring a balanced experience for your guests. You can get creative with cheeses, meats, nuts, and fruits, making it a fun personal touch for your game day celebration!
Ingredients
- 1 wheel of soft cheese (such as Brie or Camembert)
- 1 block of aged cheddar cheese
- 3-4 types of cured meats (like prosciutto, salami, and chorizo)
- 1 cup assorted crackers
- 1 cup mixed nuts
- 1 cup fresh grapes or berries
- 1/2 cup green olives
- Fresh herbs (such as rosemary or thyme) for garnish
Instructions
- Start by selecting a large wooden or marble board as your base.
- Place the soft cheese in the center of the board. Cut wedges into the aged cheddar and arrange around the soft cheese.
- Artfully arrange slices of cured meats around the cheeses, folding them for a more appealing look.
- Add clusters of crackers and nuts in different sections to fill the gaps.
- Scatter fresh grapes or berries across the board for a pop of color and freshness.
- Finish off by placing olives and garnishing with fresh herbs for an aromatic touch.
Mini Taco Cups with Ground Beef
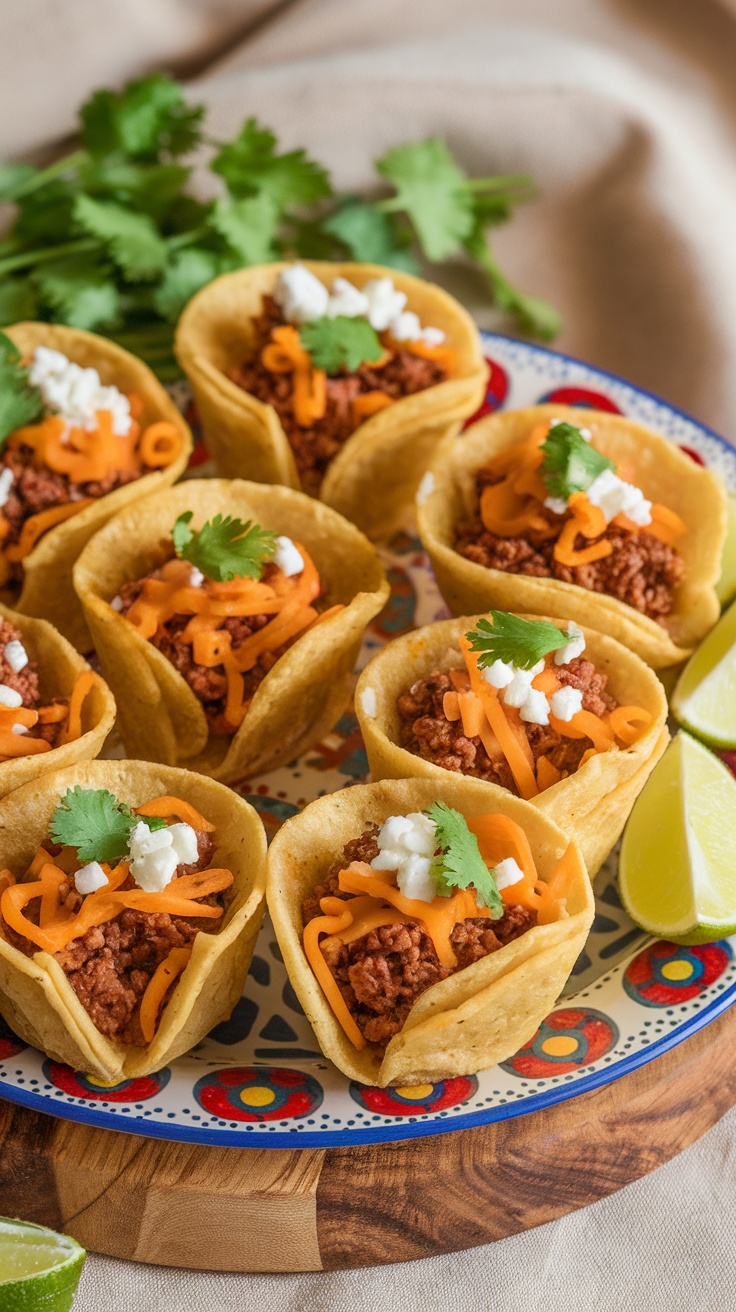
Mini taco cups are a fun and flavorful twist on traditional tacos, perfect for game day gatherings. These bite-sized treats are easy to make and bursting with savory ground beef, melted cheese, and fresh toppings. They bring together the classic tastes of a taco in a cute, handheld form that everyone will love.
With a crispy shell and a hearty filling, these mini taco cups are simple enough for even novice cooks to whip up. They can be customized with your favorite toppings, making them a hit at any celebration. Enjoy the delicious combination of flavors and textures as you cheer on your team!
Ingredients
- 1 pound ground beef
- 1 packet taco seasoning
- 1 cup shredded cheddar cheese
- 24 mini taco shells
- 1/2 cup sour cream
- 1/4 cup chopped fresh cilantro
- 1/2 cup diced tomatoes
- 1/4 cup sliced jalapeños (optional)
- Lime wedges for serving
Instructions
- Preheat your oven to 350°F (175°C).
- In a skillet over medium heat, cook the ground beef until browned. Drain excess fat and add taco seasoning, following package instructions.
- Place the mini taco shells in a baking dish. Fill each shell with the seasoned ground beef.
- Top with shredded cheddar cheese and bake for about 10 minutes, until the cheese is melted and bubbly.
- Remove from the oven and let cool slightly. Top each taco cup with sour cream, diced tomatoes, cilantro, and jalapeños if desired.
- Serve with lime wedges on the side and enjoy!
Thai Chicken Satay Skewers
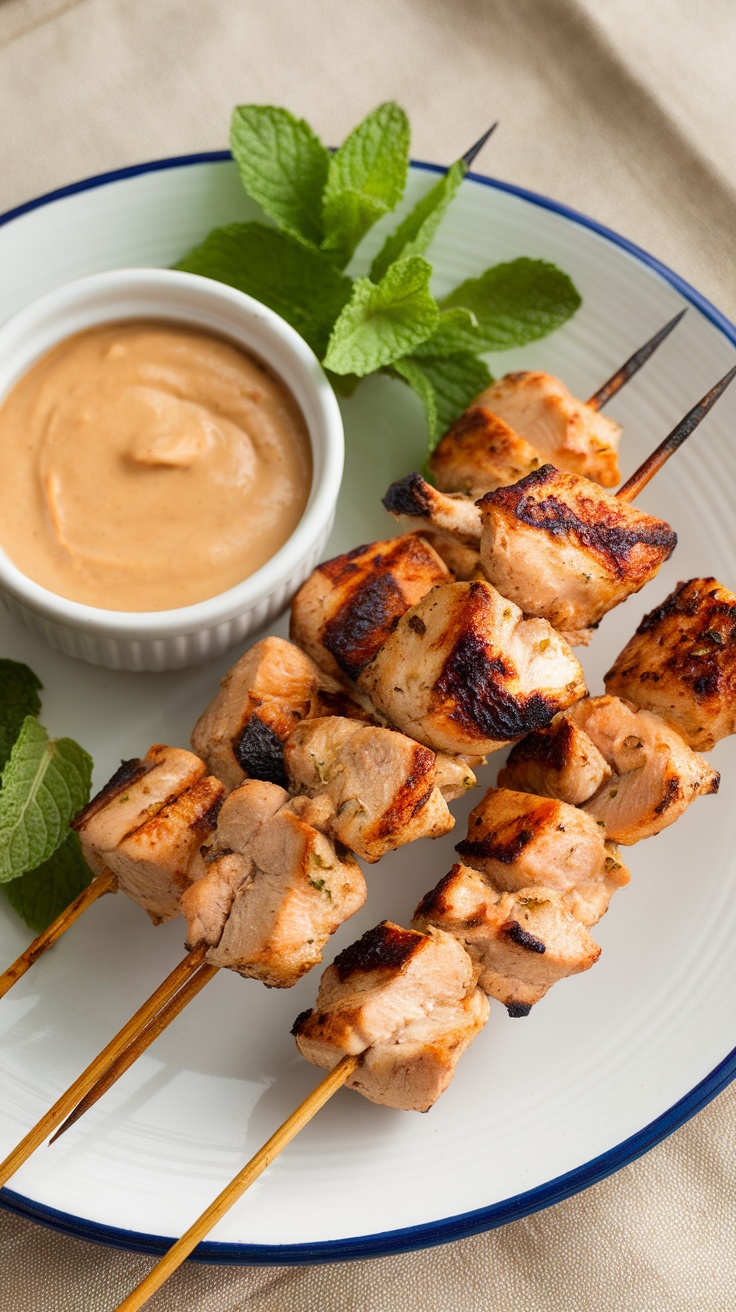
Thai Chicken Satay Skewers are a delicious way to bring a burst of flavor to your game day spread. These tender pieces of chicken are marinated in a mix of spices, coconut milk, and peanut sauce, giving them a rich and savory taste that everyone loves. They’re not just tasty; they’re also easy to make, which is perfect for any gathering.
Grilling the skewers adds a smoky touch that elevates the flavors, making them a hit among friends and family. Serve them with extra peanut sauce for dipping, and you’ve got a snack that’s sure to please a crowd!
Ingredients
- 1 pound chicken breast, cut into bite-sized pieces
- 1/4 cup coconut milk
- 2 tablespoons soy sauce
- 2 tablespoons brown sugar
- 1 tablespoon curry powder
- 1 tablespoon lime juice
- 1 teaspoon garlic, minced
- 1/2 teaspoon salt
- 8 wooden skewers, soaked in water
- 1/2 cup peanut butter
- 1/4 cup coconut milk (for the sauce)
- 1 tablespoon soy sauce (for the sauce)
- 1 tablespoon lime juice (for the sauce)
- 1 tablespoon brown sugar (for the sauce)
Instructions
- Marinate the Chicken: In a bowl, combine coconut milk, soy sauce, brown sugar, curry powder, lime juice, garlic, and salt. Add the chicken pieces, mixing well. Cover and refrigerate for at least 1 hour.
- Prepare the Skewers: Preheat the grill to medium-high heat. Thread the marinated chicken onto the soaked skewers.
- Grill the Chicken: Place the skewers on the grill and cook for about 5-7 minutes on each side, or until the chicken is cooked through and has nice grill marks.
- Make the Peanut Sauce: In a small saucepan over low heat, combine peanut butter, coconut milk, soy sauce, lime juice, and brown sugar. Stir until smooth and heated through.
- Serve: Remove the skewers from the grill and serve with the warm peanut sauce on the side.
Creamy Mac and Cheese Bites
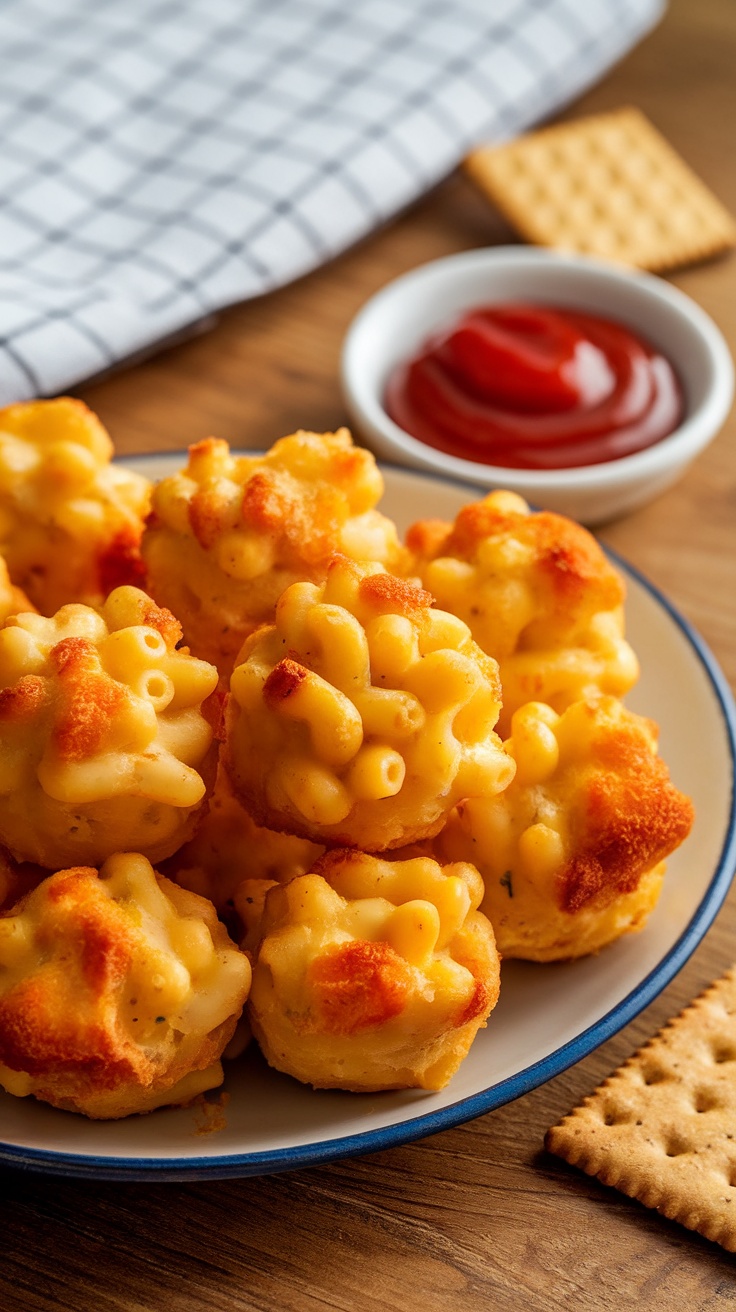
Creamy Mac and Cheese Bites are the perfect finger food for game day! These little morsels pack a bold cheesy flavor in a fun, bite-sized format. Crispy on the outside and creamy on the inside, they are sure to be a hit at any gathering. Plus, they’re simple to whip up, making them an easy addition to your snacks lineup.
With just a few ingredients and minimal prep, you can have these cheesy delights ready in no time. They are great for dipping in your favorite sauces or enjoying straight from the oven. Whether you’re cheering for your team or enjoying a movie night, these Mac and Cheese Bites will definitely satisfy your cravings.
Ingredients
- 2 cups cooked macaroni
- 2 cups shredded cheddar cheese
- 1 cup milk
- 2 large eggs
- 1/2 cup breadcrumbs
- 1/4 cup grated Parmesan cheese
- 1 teaspoon garlic powder
- 1/2 teaspoon salt
- 1/4 teaspoon black pepper
- Cooking spray
Instructions
- Preheat your oven to 375°F (190°C) and grease a mini muffin tin with cooking spray.
- In a large bowl, combine cooked macaroni, cheddar cheese, milk, eggs, garlic powder, salt, and pepper. Mix until well combined.
- Using a spoon, fill each muffin tin cup with the macaroni mixture, pressing down slightly to pack it in.
- Sprinkle breadcrumbs and Parmesan cheese on top of each filled cup.
- Bake for 15-20 minutes, or until the tops are golden brown and bubbly.
- Allow to cool for a few minutes before carefully removing from the muffin tin. Serve with your favorite dipping sauce.
Savory Cheesy Garlic Breadsticks
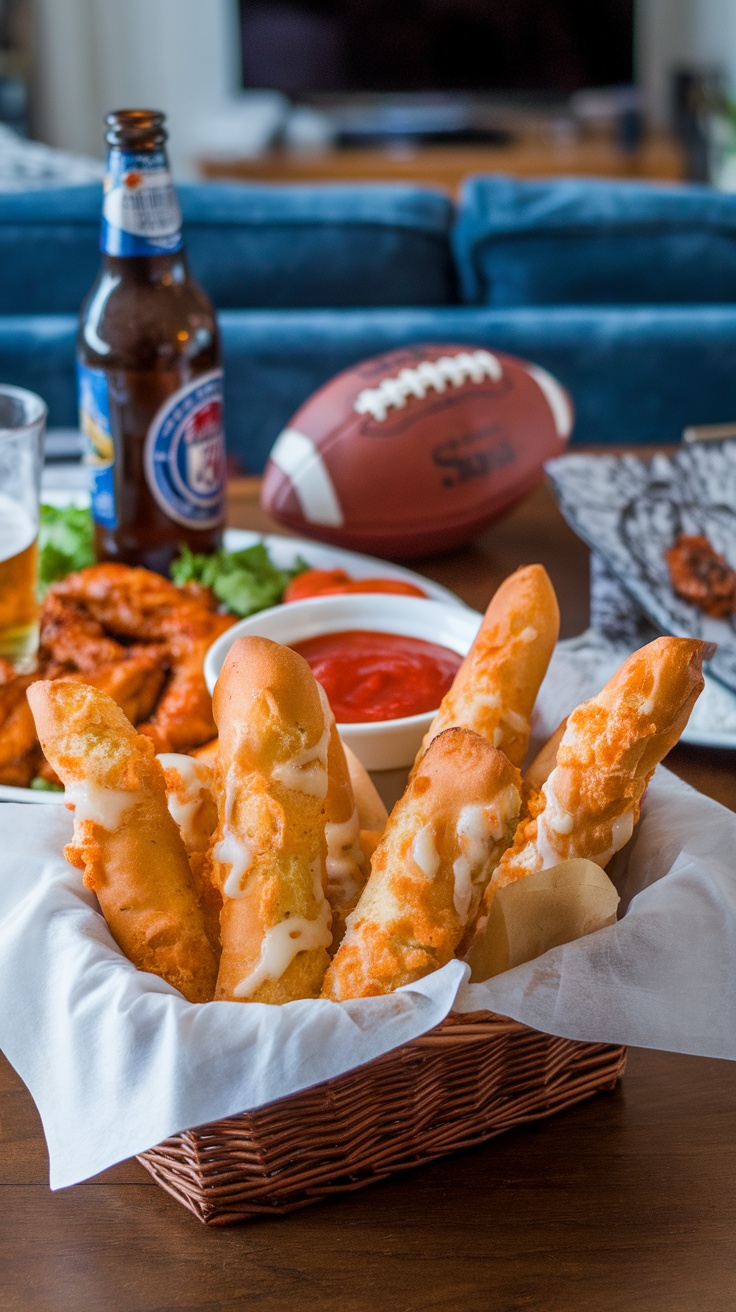
Cheesy garlic breadsticks are the perfect addition to any game day spread. With their crispy exterior and gooey cheese interior, they offer a delightful burst of flavor that pairs perfectly with marinara sauce or your favorite dip. This recipe is simple enough for anyone to whip up, making it an excellent choice for both seasoned chefs and kitchen newbies.
These breadsticks are warm, cheesy, and infused with the savory taste of garlic. As you take a bite, you’ll experience a comforting mix of textures and flavors that are sure to please any crowd. Whether you’re sharing them with friends or keeping them all to yourself, they won’t last long!
Ingredients
- 2 cups all-purpose flour
- 1 teaspoon garlic powder
- 1 teaspoon salt
- 1 tablespoon sugar
- 1 tablespoon active dry yeast
- 3/4 cup warm water (110°F)
- 2 tablespoons olive oil
- 1 cup shredded mozzarella cheese
- 1/4 cup grated Parmesan cheese
- 1 tablespoon Italian seasoning
- Marinara sauce for dipping
Instructions
- Prepare the Dough: In a bowl, combine warm water, sugar, and yeast. Let it sit for about 5 minutes until bubbly. Stir in olive oil, flour, garlic powder, salt, and Italian seasoning until a soft dough forms.
- Knead the Dough: Turn the dough out onto a floured surface and knead for about 5 minutes until smooth. Place in a greased bowl, cover, and let rise in a warm area for about 1 hour, or until doubled in size.
- Shape the Breadsticks: Preheat your oven to 400°F (200°C). Roll out the dough into a rectangle and cut into strips. Place on a baking sheet lined with parchment paper.
- Add Cheese: Sprinkle mozzarella and Parmesan cheese generously over the top of each breadstick.
- Bake: Bake for 15-20 minutes until golden brown. Serve warm with marinara sauce on the side for dipping.
Mediterranean Couscous Salad
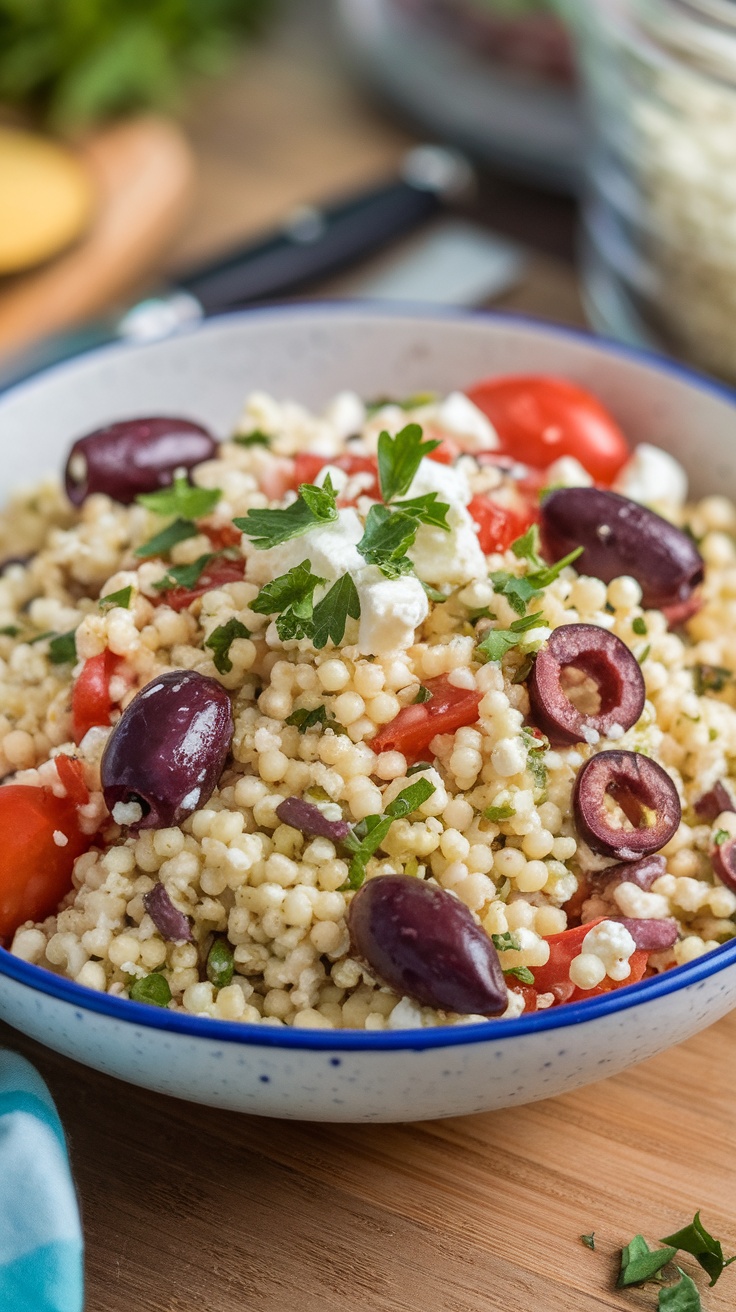
This Mediterranean Couscous Salad is a vibrant and refreshing dish perfect for any game day gathering. It combines fluffy couscous with fresh vegetables, olives, and a tangy dressing, offering a delightful burst of flavors in every bite.
Not only is this salad easy to prepare, but it’s also a crowd-pleaser. The combination of textures and tastes makes it a fantastic side or even a light main dish, ensuring your guests stay energized for the game.
Ingredients
- 1 cup couscous
- 1 ½ cups vegetable broth
- 1 cup cherry tomatoes, halved
- 1/2 cup cucumber, diced
- 1/2 cup red onion, finely chopped
- 1/2 cup Kalamata olives, pitted and sliced
- 1/4 cup feta cheese, crumbled
- 1/4 cup fresh parsley, chopped
- 3 tablespoons olive oil
- 2 tablespoons lemon juice
- Salt and pepper to taste
Instructions
- Cook the Couscous: In a pot, bring the vegetable broth to a boil. Stir in the couscous, cover, and remove from heat. Let it sit for about 5 minutes until the couscous is fluffy.
- Prepare the Vegetables: While the couscous cools, chop the tomatoes, cucumber, red onion, and olives. Set them aside in a large mixing bowl.
- Mix the Salad: Fluff the couscous with a fork and add it to the bowl of vegetables. Add the feta cheese and parsley.
- Make the Dressing: In a small bowl, whisk together the olive oil, lemon juice, salt, and pepper. Pour the dressing over the salad and toss gently to combine.
- Serve: Chill in the refrigerator for about 30 minutes before serving to let the flavors meld. Enjoy with your favorite game day snacks!
Buffalo Cauliflower Bites
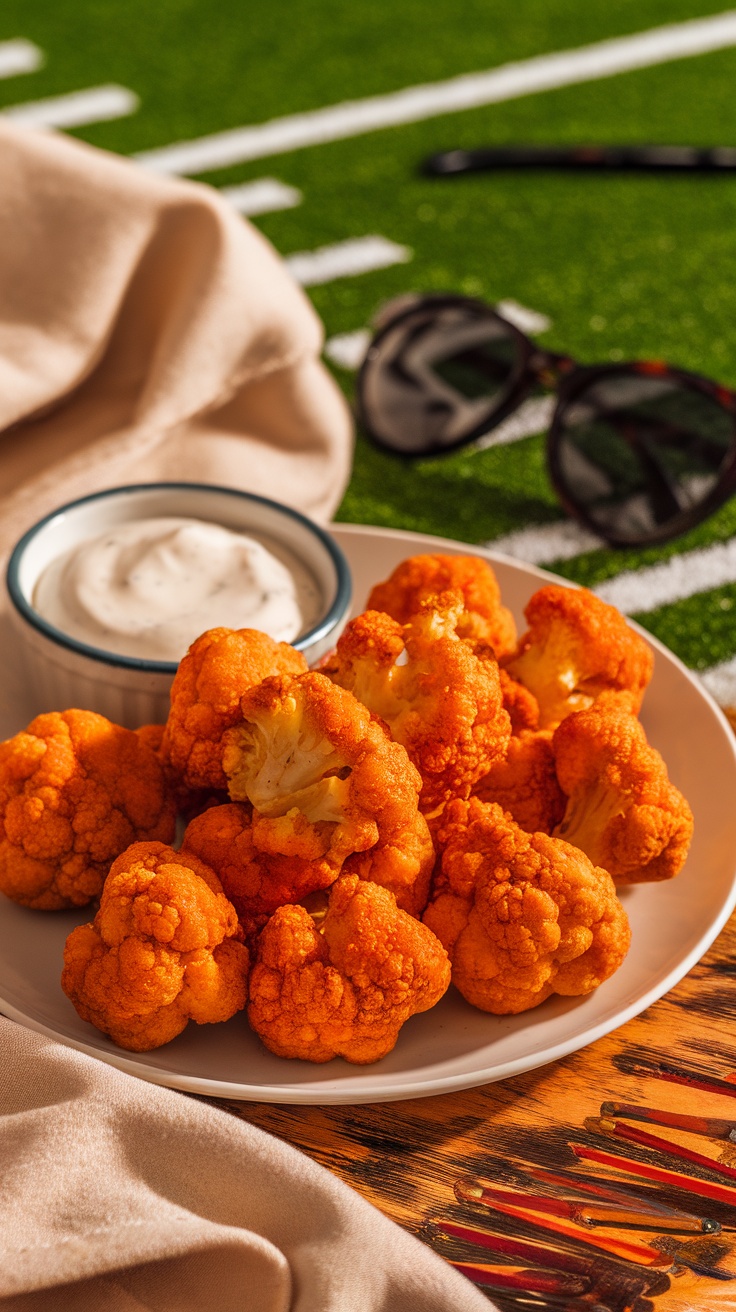
Buffalo Cauliflower Bites are a fantastic game day snack that packs a punch of flavor without compromising on health. These spicy, crispy bites are easy to make and will satisfy any craving for buffalo wings, making them a perfect addition to your game day spread.
With a simple coating of batter and a generous drizzle of buffalo sauce, these bites are baked to perfection, giving them that irresistible crunch. Serve them with a side of ranch or blue cheese dressing for dipping, and watch them disappear faster than a touchdown!
Ingredients
- 1 head of cauliflower, cut into bite-sized florets
- 1 cup all-purpose flour
- 1 teaspoon garlic powder
- 1 teaspoon onion powder
- 1/2 teaspoon salt
- 1 cup water
- 1 cup buffalo sauce
- 2 tablespoons olive oil
Instructions
- Preheat your oven to 450°F (232°C) and line a baking sheet with parchment paper.
- In a bowl, mix flour, garlic powder, onion powder, and salt. Gradually add water, whisking until smooth.
- Dip each cauliflower floret into the batter, ensuring it’s well coated. Place them on the prepared baking sheet.
- Bake for 20 minutes, flipping halfway through until golden brown.
- In a separate bowl, combine baked cauliflower with buffalo sauce and olive oil, tossing to coat evenly.
- Return to the oven and bake for another 10 minutes for a crispy finish.
- Serve hot with your favorite dipping sauce.
Fruit Skewers with Yogurt Dip
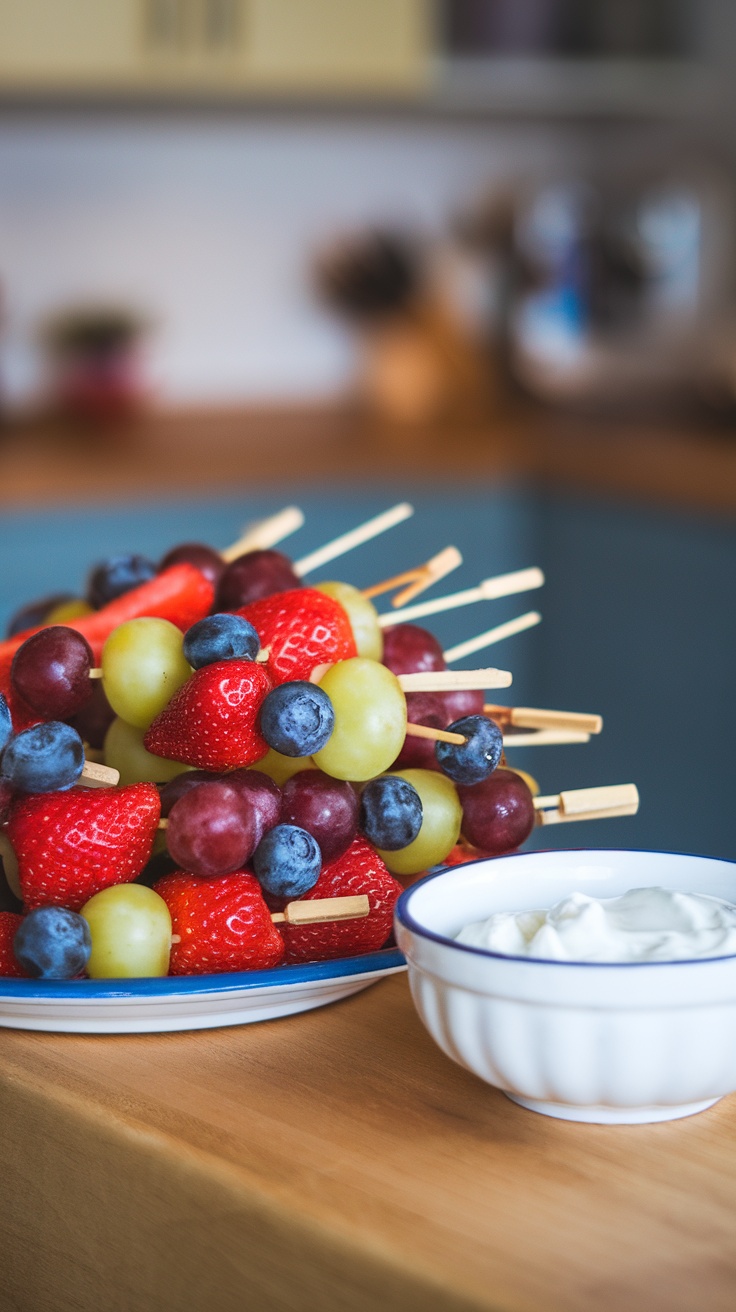
Fruit skewers are a colorful and healthy treat perfect for game day gatherings. These vibrant skewers are not just visually appealing but also refreshing and delicious. The combination of sweet fruits like strawberries, grapes, and blueberries paired with a creamy yogurt dip makes for a delightful snack that everyone will enjoy.
Making fruit skewers is incredibly easy and requires minimal effort, making it a stress-free option for entertaining. The yogurt dip adds a nice tang and creaminess that complements the natural sweetness of the fruit. Get ready to impress your guests with this simple yet tasty recipe!
Ingredients
- 1 cup strawberries, hulled and halved
- 1 cup grapes, halved (red or green)
- 1 cup blueberries
- 1 cup green melon, cubed
- Wooden skewers
- 1 cup plain Greek yogurt
- 2 tablespoons honey
- 1 teaspoon vanilla extract
Instructions
- Prepare the Yogurt Dip: In a small bowl, mix the Greek yogurt, honey, and vanilla extract until smooth. Set aside.
- Assemble the Skewers: On each skewer, thread the strawberries, grapes, blueberries, and melon in any order you like. Fill each skewer with a variety of colors and textures.
- Serve: Arrange the fruit skewers on a platter with the yogurt dip on the side for dipping. Enjoy this fun and healthy snack!
Chocolate Chip Cookie Bars
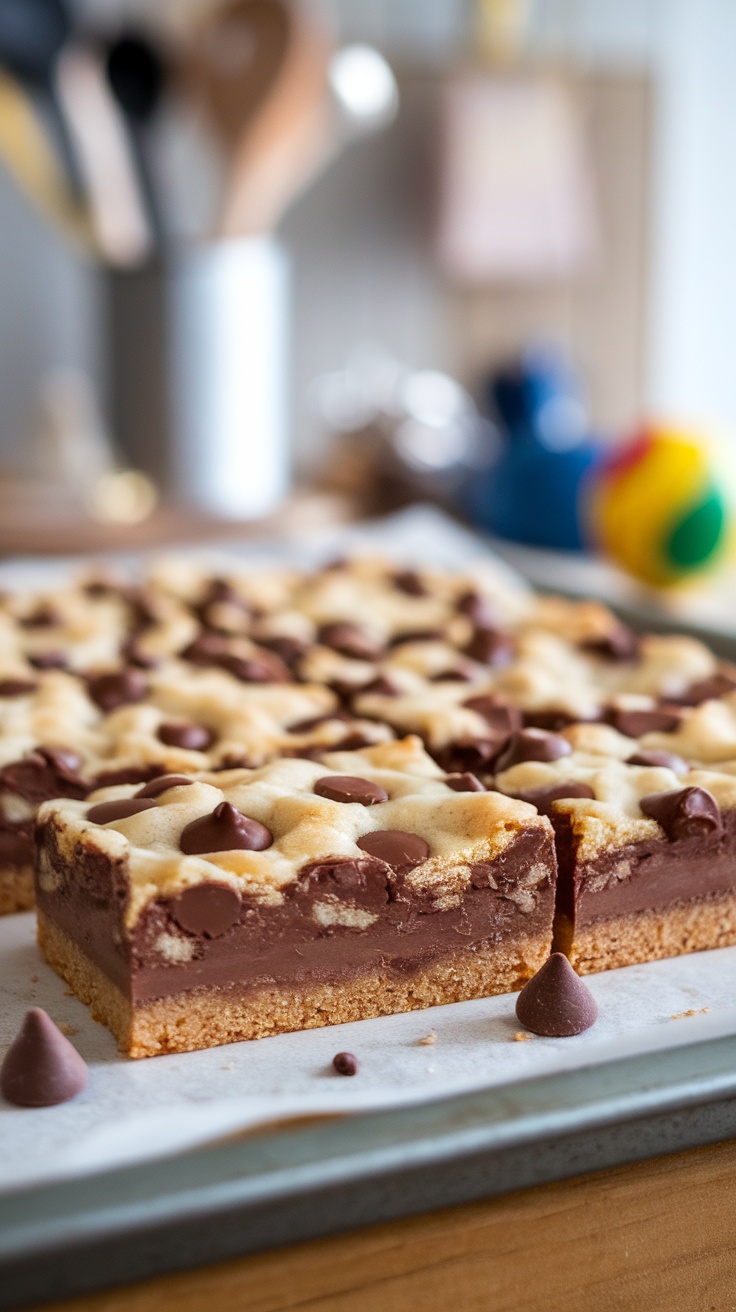
Chocolate chip cookie bars are the perfect treat for game day! They combine the classic taste of chocolate chip cookies with a chewy, bar-like texture that makes them easy to cut and serve. With a rich layer of chocolate and a crisp golden top, these bars are sure to please any crowd.
Making these cookie bars is simple and quick. You don’t need to fuss with individual cookies; just mix, layer, and bake! These sweet bars are delightful on their own or served warm with a scoop of ice cream. They’re a guaranteed hit!
Ingredients
- 1 cup unsalted butter, softened
- 1 cup brown sugar, packed
- 1/2 cup granulated sugar
- 2 large eggs
- 2 teaspoons vanilla extract
- 3 cups all-purpose flour
- 1 teaspoon baking soda
- 1/2 teaspoon salt
- 2 cups semi-sweet chocolate chips
- 1 cup chocolate fudge (optional, for layering)
Instructions
- Preheat your oven to 350°F (175°C) and grease a 9×13 inch baking dish.
- In a large bowl, cream together the softened butter, brown sugar, and granulated sugar until smooth. Beat in the eggs and vanilla extract.
- In another bowl, whisk together the flour, baking soda, and salt. Gradually add the dry ingredients to the wet mixture, stirring until just combined.
- Spread half of the cookie dough in the bottom of the prepared baking dish. If using, layer the chocolate fudge over the dough, then top with the remaining dough. Sprinkle the chocolate chips on top.
- Bake for 25-30 minutes or until the edges are golden brown. Allow cooling before cutting into bars and serving.
Crispy Shrimp Tacos with Slaw
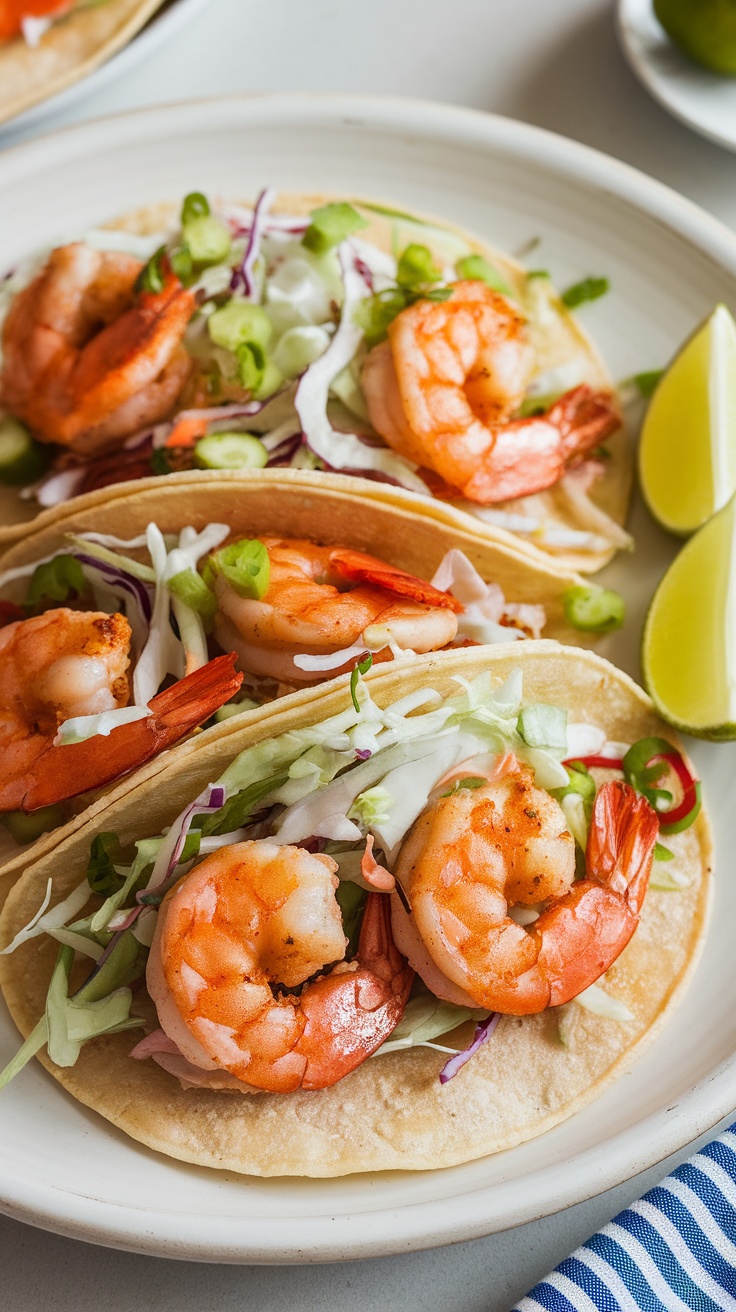
These crispy shrimp tacos are a perfect choice for game day, offering a delightful crunch and a burst of flavor. The shrimp are seasoned and cooked to golden perfection, providing a tasty contrast to the refreshing slaw. They’re easy to make, ensuring you can whip them up quickly, leaving more time for cheering on your team!
Each taco showcases seasoned shrimp nestled in soft tortillas, topped with a vibrant slaw for that extra crunch. Serve them with lime wedges for a zesty kick. These tacos will definitely be a hit at your next gathering!
Ingredients
- 1 pound large shrimp, peeled and deveined
- 1 tablespoon olive oil
- 1 teaspoon garlic powder
- 1 teaspoon paprika
- Salt and pepper to taste
- 8 small corn or flour tortillas
- 2 cups shredded cabbage (green and purple)
- 1/2 cup diced tomatoes
- 1/4 cup chopped cilantro
- 1 lime, juiced
- Sour cream or crema for topping (optional)
Instructions
- Preheat your grill or stovetop skillet over medium-high heat.
- In a bowl, toss the shrimp with olive oil, garlic powder, paprika, salt, and pepper until well coated.
- Add the shrimp to the hot grill or skillet, cooking for 2-3 minutes on each side until they turn pink and are cooked through.
- While the shrimp are cooking, prepare the slaw by mixing the shredded cabbage, diced tomatoes, cilantro, and lime juice in a separate bowl. Season with salt and pepper to taste.
- Warm the tortillas on the grill or in a pan for about 30 seconds on each side.
- Assemble the tacos by placing shrimp in each tortilla and topping with the cabbage slaw. Add sour cream or crema if desired.
- Serve immediately with lime wedges on the side.
Cheddar and Bacon Stuffed Potato Skins
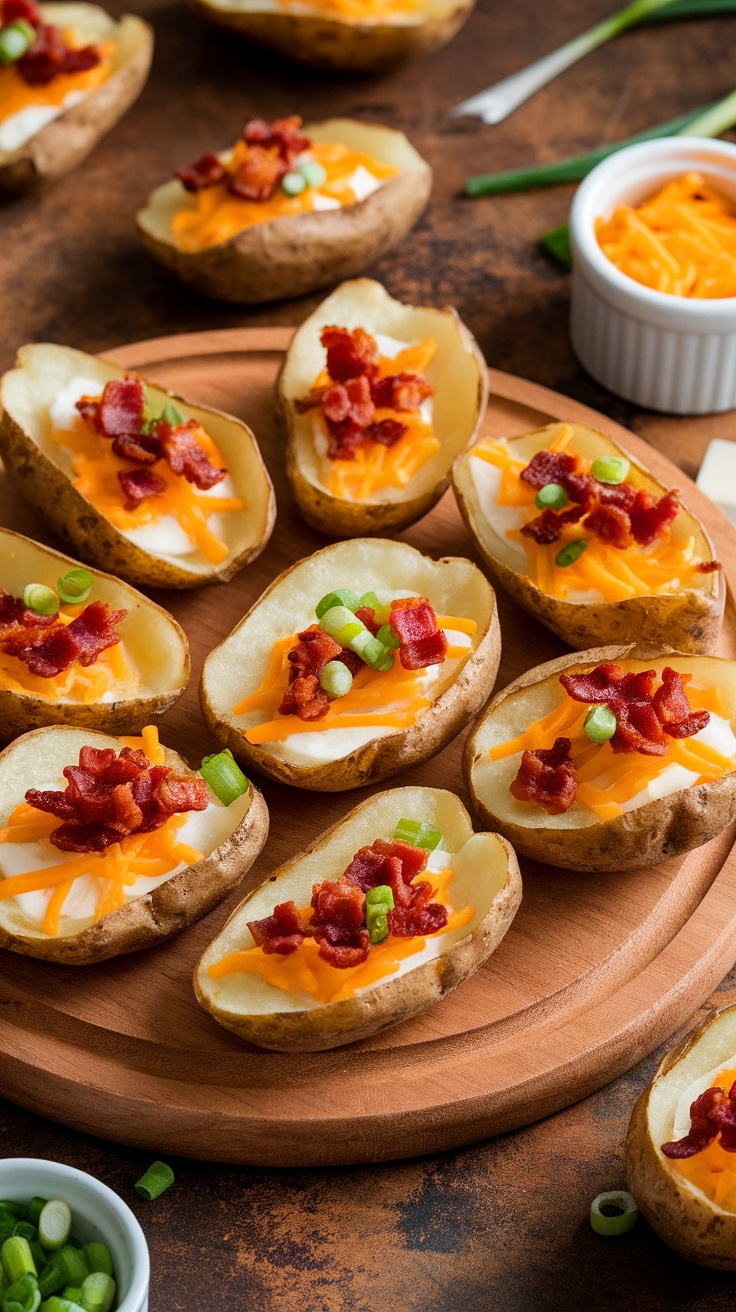
Cheddar and bacon stuffed potato skins are a fantastic game day treat that combines the heartiness of baked potatoes with the irresistible flavors of cheese and crispy bacon. These little delights are sure to be a hit at any gathering, offering a satisfying crunch with every bite. They are easy to prepare, making them perfect for both novice cooks and seasoned chefs alike.
This recipe highlights the classic combination of creamy cheddar cheese and savory bacon, enhanced with a touch of green onions for a fresh twist. Whether you’re hosting friends for a big game or simply enjoying a movie night at home, these potato skins will add a delicious touch to your snack table.
Ingredients
- 4 large russet potatoes
- 1 cup shredded cheddar cheese
- 1/2 cup cooked and crumbled bacon
- 1/4 cup sour cream
- 2 green onions, sliced
- Salt and pepper to taste
- Olive oil
Instructions
- Preheat your oven to 400°F (200°C). Wash and dry the potatoes, then poke a few holes in each with a fork. Rub them with olive oil and sprinkle with salt.
- Bake the potatoes for 45-60 minutes, or until tender. Let them cool slightly, then cut each potato in half lengthwise and scoop out most of the flesh, leaving about a 1/4-inch border.
- Brush the insides of the potato skins with olive oil and season with salt and pepper. Place them cut-side down on a baking sheet and return to the oven for an additional 10-15 minutes until crispy.
- Remove from the oven and fill each skin with a mixture of the cheddar cheese, crumbled bacon, and sliced green onions. Place them back in the oven for another 5-10 minutes, until the cheese is melted and bubbly.
- Serve warm, topped with a dollop of sour cream and an extra sprinkle of green onions if desired.
Caramelized Onion and Gruyère Tart
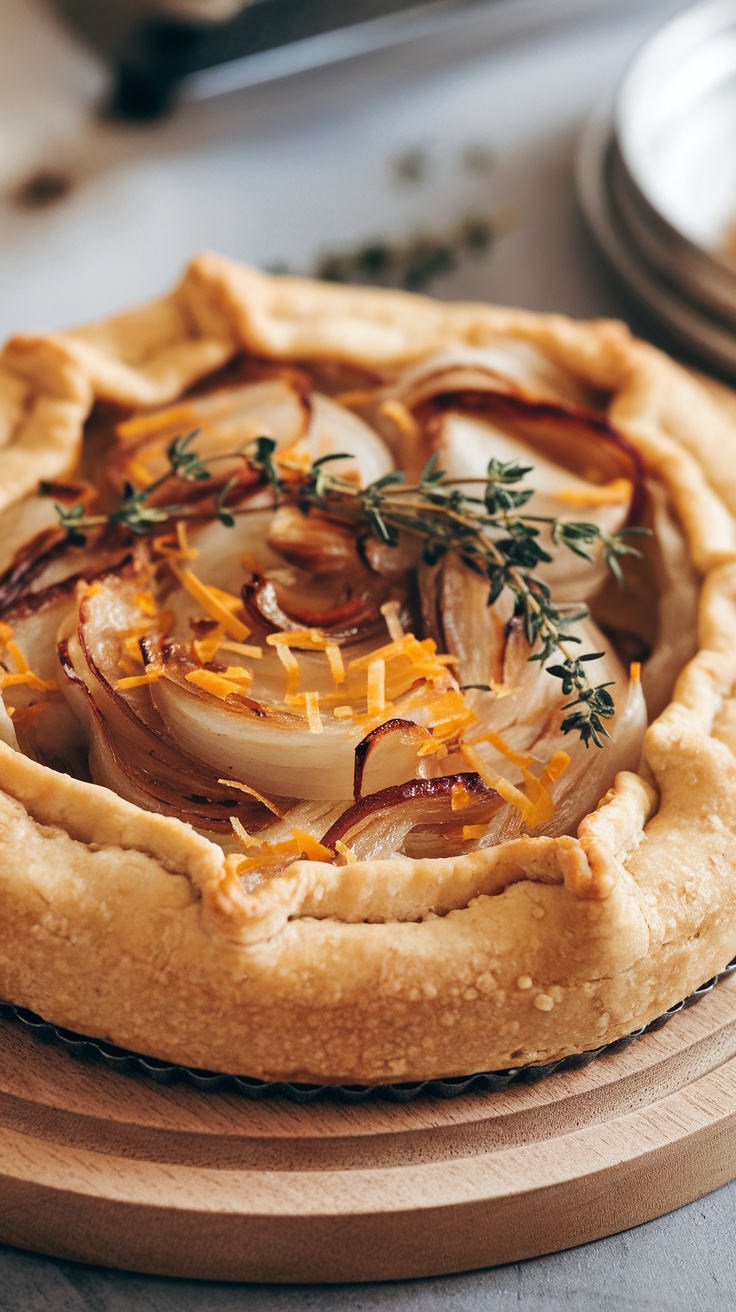
This caramelized onion and Gruyère tart is a delightful addition to any game day spread. With its flaky crust and sweet, savory filling, it’s sure to impress your guests. The rich flavor of caramelized onions combined with the nutty Gruyère cheese creates a mouthwatering experience that is both comforting and sophisticated.
Making this tart is simpler than it might seem. It requires just a few ingredients and can be prepared ahead of time, allowing you to enjoy the game without stress. It’s a fantastic dish to share with friends while cheering for your favorite team!
Ingredients
- 1 pre-made pie crust
- 2 large onions, thinly sliced
- 2 tablespoons olive oil
- 1 tablespoon butter
- 1 teaspoon sugar
- 1 teaspoon salt
- 1/2 teaspoon black pepper
- 1 teaspoon fresh thyme, chopped
- 1 cup Gruyère cheese, grated
- 1 egg, beaten (for egg wash)
Instructions
- Preheat your oven to 375°F (190°C).
- In a skillet, heat olive oil and butter over medium heat. Add sliced onions, sugar, salt, and pepper. Cook, stirring occasionally, until onions are caramelized, about 20-25 minutes.
- Once caramelized, stir in fresh thyme and remove from heat. Allow to cool slightly.
- Roll out the pie crust and place it in a tart pan. Prick the bottom with a fork.
- Spread the Gruyère cheese evenly over the crust.
- Top with the caramelized onion mixture.
- Brush the edges of the crust with the beaten egg for a golden finish.
- Bake for 30-35 minutes or until the crust is golden brown and the cheese is bubbly.
- Let cool slightly before slicing and serving. Enjoy!
S’mores Dip with Graham Crackers
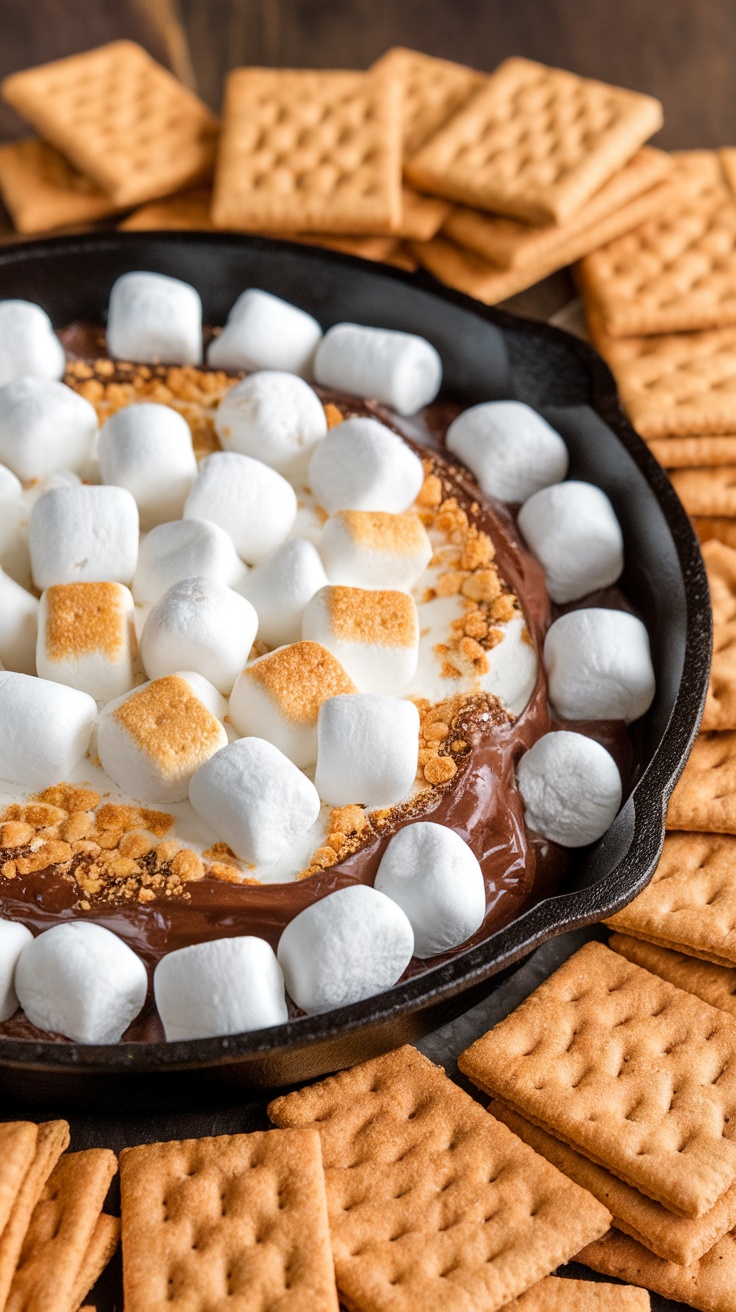
S’mores Dip is a fun twist on the classic campfire treat, combining gooey melted chocolate, rich marshmallows, and crunchy graham crackers all in one delicious dish. This dessert is perfect for game day gatherings, offering a sweet and satisfying flavor that everyone will love. Plus, it’s incredibly simple to make—just layer your ingredients in a skillet and let the oven do the work!
As the chocolate and marshmallows melt together, they create a warm and inviting dip that pairs perfectly with crispy graham crackers. This recipe is sure to please both kids and adults alike, making it a fantastic addition to your game day spread!
Ingredients
- 1 cup chocolate chips (milk or dark)
- 1 cup mini marshmallows
- 1/2 cup heavy cream
- 1/4 cup crushed graham crackers
- Graham crackers for dipping
Instructions
- Preheat your oven to 450°F (230°C).
- In a cast-iron skillet, layer the chocolate chips evenly on the bottom.
- Pour the heavy cream over the chocolate chips, ensuring they are all covered.
- Top with mini marshmallows and crushed graham crackers.
- Bake in the preheated oven for 5-7 minutes, or until the marshmallows are golden brown.
- Remove from the oven and let cool slightly before serving with graham crackers for dipping.
