Get ready to spread some sweetness this holiday season with these easy Christmas candy recipes! From mouthwatering fudge to colorful peppermint bark, these treats are simple to whip up and perfect for sharing with friends and family. Not only will you satisfy your sweet tooth, but you’ll also create delightful gifts that everyone will love. Let’s make this Christmas a little sweeter!
Chocolate Truffles with Various Flavors

Indulge in the rich, velvety world of chocolate truffles, where every bite is a blissful experience. These truffles are not just a treat; they are a celebration of flavor and texture that will captivate your senses. With a smooth chocolate ganache center and a variety of coatings, these truffles are a delightful way to impress friends and family or simply savor a moment of sweetness.
Whether you’re a chocolate lover or just looking for a unique dessert idea, these truffles can be customized to suit any palate. From classic dark chocolate to exotic flavors like raspberry or espresso, the possibilities are endless. Each truffle is a little piece of heaven, perfect for special occasions or as a personal indulgence.

Chocolate Truffles Recipe
Ingredients
- 8 ounces dark chocolate finely chopped
- 1/2 cup heavy cream
- 2 tablespoons unsalted butter
- Flavoring options: Vanilla extract espresso powder, raspberry puree, orange zest, or liqueurs (such as rum or Grand Marnier)
- Coatings: Cocoa powder crushed nuts, shredded coconut, or melted white chocolate
Instructions
- Prepare the Ganache: In a small saucepan, heat the heavy cream over medium heat until it just begins to simmer. Remove from heat and add the chopped dark chocolate and butter. Stir until smooth and glossy.
- Flavor the Ganache: Divide the ganache into portions and add your desired flavorings (like vanilla, espresso, or fruit puree) to each. Mix well and refrigerate until firm, about 1-2 hours.
- Shape the Truffles: Once the ganache is firm, use a small scoop or your hands to form small balls. Roll them between your palms to create smooth spheres.
- Coat the Truffles: Roll the truffles in your choice of coatings (such as cocoa powder, nuts, or white chocolate) until fully covered.
- Chill and Serve: Place the coated truffles on a baking sheet lined with parchment paper and chill again until set. Serve chilled or at room temperature.
Notes
- Calories: 90kcal per truffle
- Fat: 6g
- Protein: 1g
- Carbohydrates: 8g
Homemade Fudge with Nuts and Marshmallows
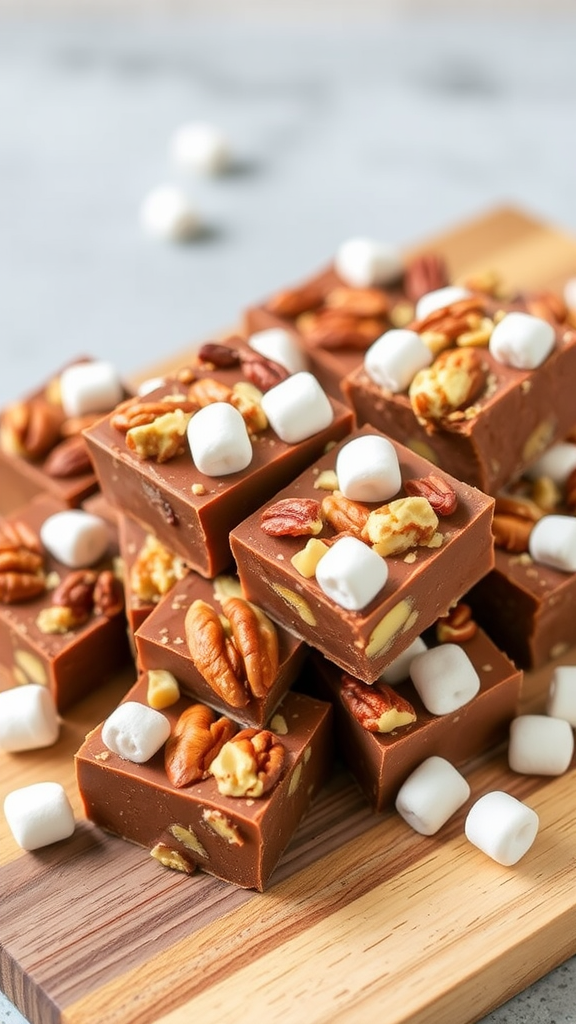
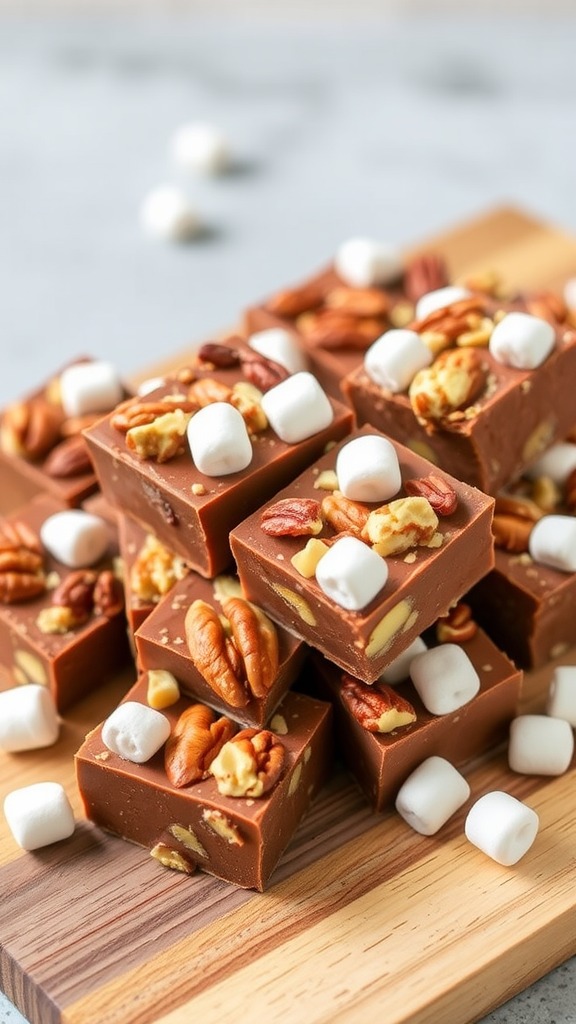
Craving a sweet treat that’s as indulgent as it is easy to make? This homemade fudge with nuts and marshmallows is the answer. It’s rich, creamy, and loaded with delightful textures that make each bite a little party in your mouth. Perfect for sharing (or not!), this recipe is a go-to for satisfying your sweet tooth without a lot of fuss.
Imagine sinking your teeth into a piece of fudge that’s silky smooth, with the crunch of nuts and the chewy surprise of marshmallows. This fudge is not only simple to whip up, but it also makes for an impressive gift when wrapped in decorative paper. Your friends and family will be asking for the recipe, trust me!
This fudge is a delightful treat that can be customized to your taste. Whether you prefer walnuts, pecans, or your favorite nut, you can easily switch it up to create your own unique twist.
Irresistible Homemade Fudge Recipe
Ingredients
- 2 cups semi-sweet chocolate chips
- 1 cup sweetened condensed milk
- 1/2 cup unsalted butter
- 1 cup chopped nuts walnuts, pecans, or almonds
- 1 cup mini marshmallows
- 1 teaspoon vanilla extract
- A pinch of salt
Instructions
- Prepare the Pan: Line an 8×8 inch baking dish with parchment paper, leaving some overhang for easy removal.
- Melt the Chocolate: In a medium saucepan over low heat, combine the chocolate chips, sweetened condensed milk, and butter. Stir continuously until fully melted and smooth.
- Add Flavorings: Remove the saucepan from heat and stir in the vanilla extract and a pinch of salt.
- Mix in Nuts and Marshmallows: Gently fold in the chopped nuts and mini marshmallows until evenly distributed.
- Pour and Set: Pour the mixture into the prepared baking dish and spread it out evenly. Refrigerate for at least 2 hours or until set.
- Cut and Serve: Once set, remove the fudge from the dish using the parchment overhang. Cut into squares and enjoy!
Notes
- Fat: 12g
- Protein: 2g
- Carbohydrates: 23g
Caramel Pecan Turtle Candies

Imagine sinking your teeth into a rich, buttery caramel that melts in your mouth, paired with crunchy pecans and enveloped in smooth chocolate. That’s the magic of these caramel pecan turtle candies. Perfect for gifting during the holidays or satisfying your own sweet tooth, these candies are a delightful treat that will leave you craving more.
These turtle candies are not just a dessert; they’re an experience. The crispy pecans provide the perfect contrast to the gooey caramel, while the chocolate coating brings everything together in one luscious bite. Whether you’re making them for a special occasion or just to indulge yourself, they are sure to impress everyone who tries them.

Indulgent Caramel Pecan Turtle Candies
Ingredients
- 1 cup pecan halves
- 1 cup granulated sugar
- 1/4 cup unsalted butter
- 1/4 cup heavy cream
- 1 teaspoon vanilla extract
- 1/4 teaspoon salt
- 2 cups semisweet chocolate chips
- 1 tablespoon vegetable oil for thinning chocolate
Instructions
- Toast the Pecans: Preheat your oven to 350°F (175°C). Spread the pecan halves on a baking sheet and toast them for about 5-7 minutes until fragrant. Let them cool.
- Make the Caramel: In a saucepan, combine the sugar and butter over medium heat. Stir until the butter is melted. Gradually add the heavy cream while stirring constantly. Continue cooking and stirring until the mixture reaches a soft ball stage (about 240°F or 115°C). Remove from heat and stir in vanilla and salt.
- Assemble the Turtles: On a parchment-lined baking sheet, place 3-4 pecan halves together to form a base. Spoon a small amount of the caramel mixture over the pecans, allowing it to spread slightly. Repeat with remaining pecans and caramel.
- Melt the Chocolate: In a microwave-safe bowl, combine chocolate chips and vegetable oil. Microwave in 30-second intervals, stirring in between, until smooth.
- Coat the Candies: Drizzle or spoon the melted chocolate over each caramel-covered pecan cluster, ensuring they are well-coated. Let them set at room temperature or refrigerate to harden.
- Serve: Once the chocolate has hardened, the turtle candies are ready to be enjoyed. Store them in an airtight container for freshness.
Notes
- Fat: 9g
- Protein: 2g
- Carbohydrates: 16g
Nutty Toffee Brittle
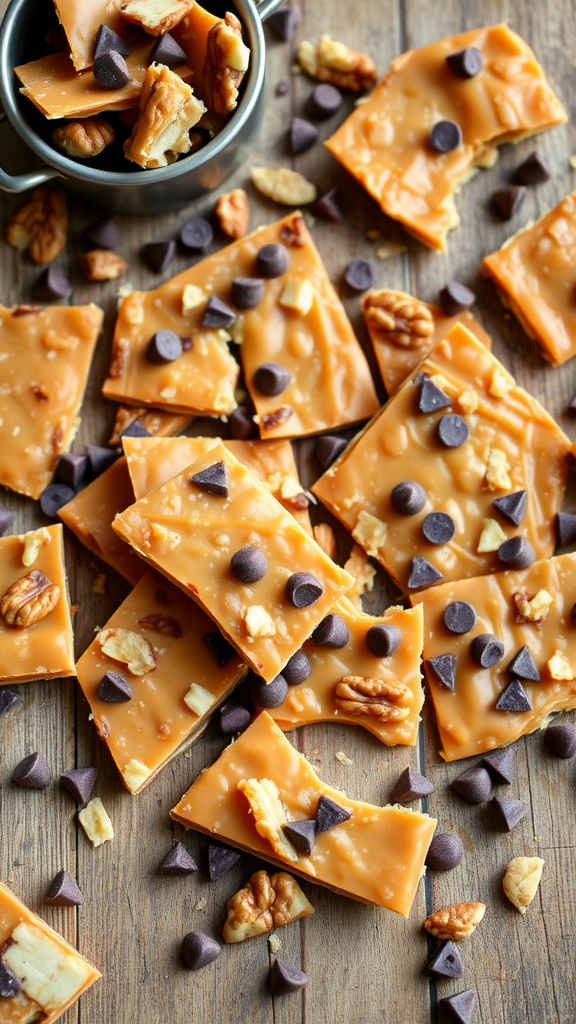
Are you ready to treat yourself to a delightful sweet snack? This Nutty Toffee Brittle is a perfect blend of rich, buttery toffee and crunchy nuts that will satisfy your sweet tooth. It’s simple to make and even more satisfying to enjoy, whether alone or shared with friends and family.
Imagine biting into this brittle and experiencing the satisfying crunch followed by a sweet, buttery flavor that melts in your mouth. The combination of nuts adds depth and texture, making it an irresistible treat for any occasion.

Delicious Homemade Nutty Toffee Brittle
Ingredients
- 1 cup unsalted butter
- 2 cups granulated sugar
- 1/2 cup light corn syrup
- 1/4 teaspoon salt
- 1 teaspoon vanilla extract
- 2 cups mixed nuts such as almonds, pecans, or walnuts
- 1 cup semisweet chocolate chips optional
- 1/2 cup chopped nuts for topping optional
Instructions
- Prepare the Baking Sheet: Line a baking sheet with parchment paper and set aside.
- Cook the Toffee: In a large saucepan, combine the butter, sugar, corn syrup, and salt over medium heat. Stir constantly until the mixture comes to a boil.
- Boil the Mixture: Continue to boil the mixture without stirring for about 10-12 minutes, or until it reaches a deep amber color. Use a candy thermometer to ensure it reaches 300°F (hard crack stage).
- Add Nuts and Vanilla: Remove from heat and quickly stir in the mixed nuts and vanilla extract until well combined.
- Pour onto Baking Sheet: Pour the toffee mixture onto the prepared baking sheet and spread it evenly. Let it cool for about 5 minutes.
- Optional Chocolate Layer: If desired, sprinkle chocolate chips over the warm brittle and let them melt. Spread the melted chocolate evenly and top with additional chopped nuts.
- Cool Completely: Allow the brittle to cool completely at room temperature until hardened. Once cooled, break it into pieces and store in an airtight container.
Notes
- Fat: 10g
- Protein: 2g
- Carbohydrates: 23g
Coconut Snowball Treats
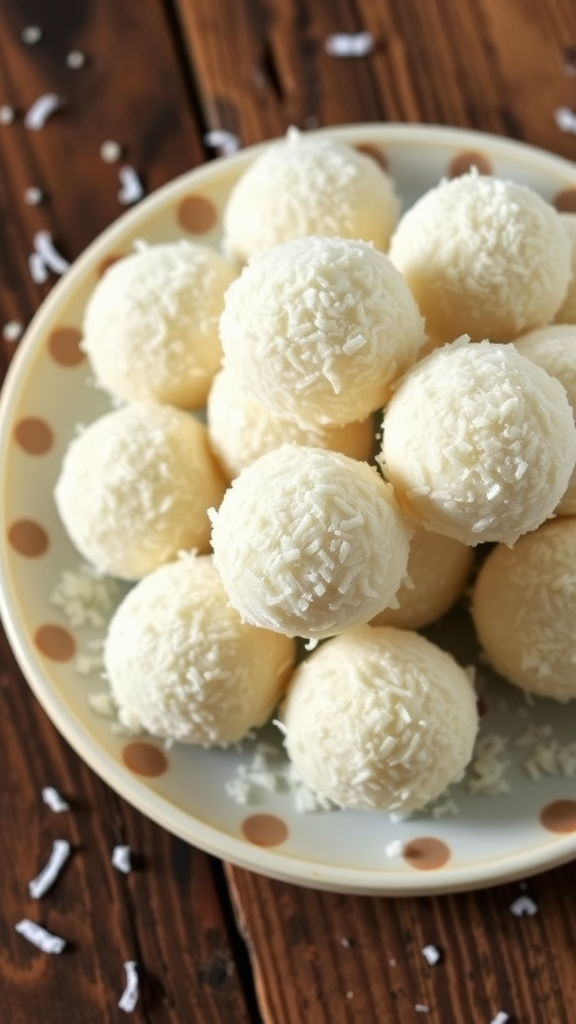
Imagine a bite-sized treat that brings a taste of the tropics right to your kitchen. These Coconut Snowball Treats are a delightful combination of sweet, chewy coconut and creamy goodness that will transport your taste buds to a sunny beach. Perfect for holidays or any sweet craving, they are fun to make and even more enjoyable to eat.
With just a handful of ingredients, these treats are incredibly simple and require no baking. You can whip them up in no time and share them with friends and family. The soft texture and rich coconut flavor will have everyone asking for seconds!

Coconut Snowball Treats Recipe
Ingredients
- 2 cups shredded coconut sweetened
- 1 cup sweetened condensed milk
- 1 teaspoon vanilla extract
- 1/2 cup powdered sugar
- 1 cup additional shredded coconut for rolling
Instructions
- Combine Ingredients: In a mixing bowl, combine the shredded coconut, sweetened condensed milk, vanilla extract, and powdered sugar. Mix until well combined.
- Shape the Treats: Using your hands, scoop out small portions of the mixture and roll them into balls, about 1 inch in diameter.
- Coat with Coconut: Roll each ball in the additional shredded coconut until fully coated.
- Chill: Place the coconut balls on a baking sheet lined with parchment paper and refrigerate for at least 30 minutes to firm up.
- Serve: Enjoy these coconut snowball treats chilled or at room temperature. They can be stored in an airtight container in the refrigerator.
Notes
- Fat: 6g
- Protein: 1g
- Carbohydrates: 16g
Peppermint Bark with White Chocolate
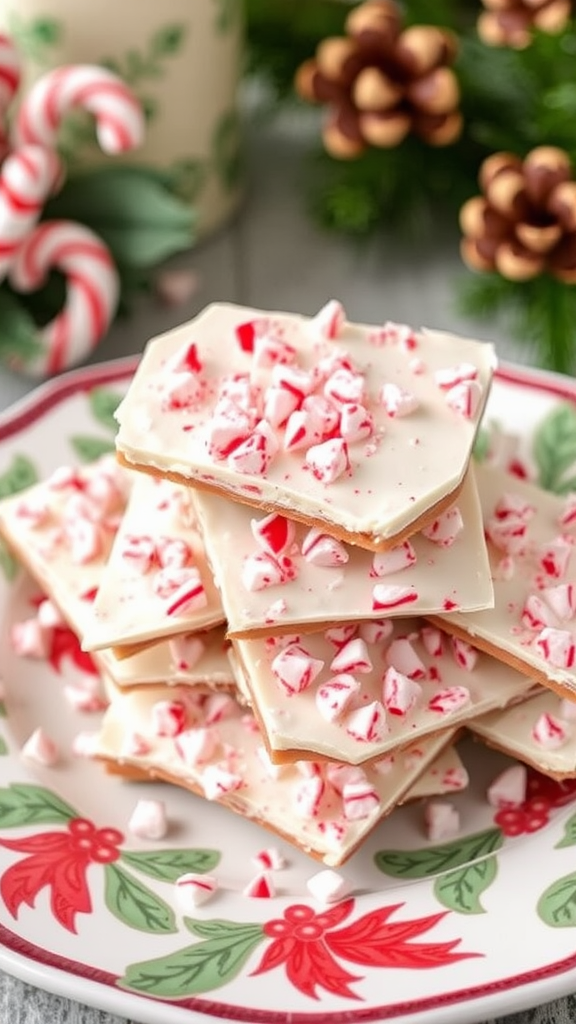
Looking for a festive treat that brings a delightful crunch and refreshing flavor to your holiday gatherings? This white chocolate peppermint bark is the answer! Rich, creamy white chocolate combined with the coolness of peppermint creates a perfect balance of sweetness. It’s a crowd-pleaser that’s incredibly easy to make, making it a must-have addition to your holiday dessert table.
Imagine breaking off a piece of this gorgeous peppermint bark and feeling the satisfying crunch of candy canes mingling with smooth white chocolate. Whether you’re making it for gifts or to enjoy yourself, this treat is sure to spread holiday cheer.
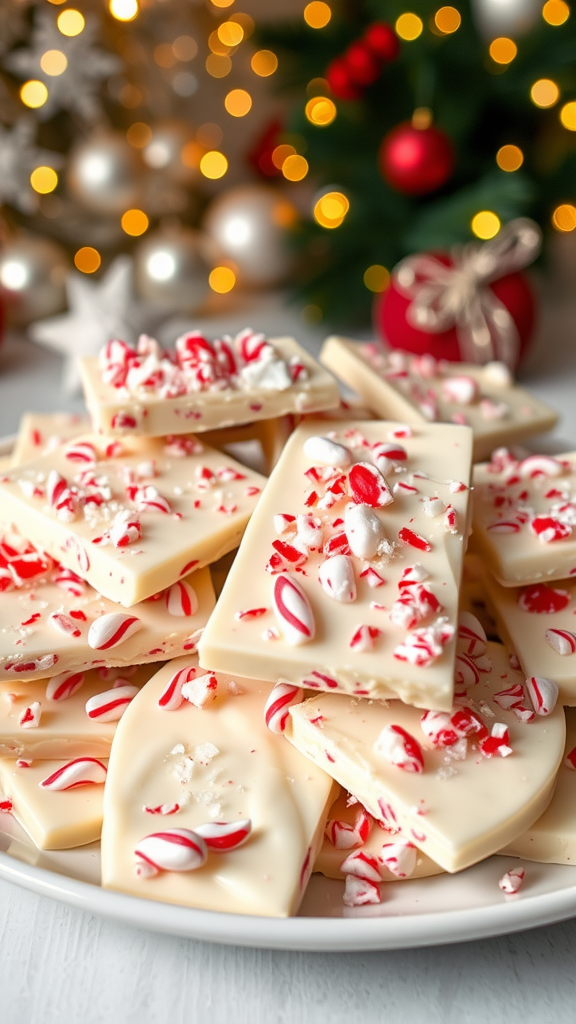
Festive and Easy White Chocolate Peppermint Bark
Ingredients
- 12 ounces white chocolate chopped or chips
- 1 teaspoon peppermint extract
- 1/2 cup crushed peppermint candies or candy canes
- Optional: a sprinkle of sea salt for garnish
Instructions
- Melt the White Chocolate: Place the chopped white chocolate in a microwave-safe bowl. Microwave in 30-second intervals, stirring in between, until completely melted and smooth.
- Add Peppermint Extract: Stir in the peppermint extract until well combined.
- Prepare the Baking Sheet: Line a baking sheet with parchment paper.
- Spread the Chocolate: Pour the melted white chocolate onto the prepared baking sheet, spreading it into an even layer about 1/4 inch thick.
- Add Crushed Peppermint: Sprinkle the crushed peppermint candies evenly over the melted chocolate, gently pressing them down to adhere.
- Chill: Place the baking sheet in the refrigerator for about 30 minutes or until the chocolate is set.
- Break into Pieces: Once set, remove from the refrigerator and break the bark into pieces. Optional: sprinkle with sea salt for an extra touch.
- Store: Keep the peppermint bark in an airtight container at room temperature or in the refrigerator.
Notes
- Fat: 8g
- Protein: 1g
- Carbohydrates: 20g
Classic Homemade Candy Canes

There’s something truly special about making your own candy canes during the holiday season. Not only do they evoke nostalgia, but they also fill your kitchen with the sweet aroma of peppermint. This classic homemade candy cane recipe is perfect for sharing, gifting, or enjoying with loved ones.
Imagine pulling warm, soft candy straight from the pot and twisting it into the iconic candy cane shape. The satisfaction of creating these treats from scratch is unmatched, and the taste is far superior to anything store-bought. Get ready to delight your family and friends with these festive delights!

Delightful Homemade Candy Canes
Ingredients
- 2 cups granulated sugar
- 1/2 cup light corn syrup
- 1/2 cup water
- 1/2 teaspoon peppermint extract
- Red food coloring
- Powdered sugar for dusting
Instructions
- Prepare Your Surface: Lightly grease a marble slab or countertop with cooking spray. This will prevent the candy from sticking.
- Combine Ingredients: In a medium saucepan, combine the sugar, corn syrup, and water. Cook over medium heat, stirring until the sugar dissolves.
- Cook to Hard Crack Stage: Stop stirring and let the mixture boil until it reaches 300°F (hard crack stage) on a candy thermometer. This typically takes about 10-15 minutes.
- Add Flavor and Color: Once at temperature, remove from heat and quickly stir in the peppermint extract. Divide the mixture into two portions; leave one portion clear and add red food coloring to the other. Mix until desired color is achieved.
- Shape the Candy Canes: Allow the candy to cool slightly until it is safe to handle. With greased hands, pull and twist the clear portion into long strips and place them next to the red strips. Twist the two colors together to create a candy cane shape.
- Cool and Store: Place the candy canes on a greased surface to cool completely. Once cooled, dust with powdered sugar to prevent sticking and store in an airtight container.
Notes
- Fat: 0g
- Protein: 0g
- Carbohydrates: 17g
Chocolate-Covered Cherry Delights

If you’re a fan of sweet treats that combine chocolate and fruit, these chocolate-covered cherry delights are the perfect indulgence. They bring together the rich taste of chocolate and the tartness of cherries, creating a delightful contrast that will satisfy your sweet tooth.
These delights are not just a treat; they’re an experience. Each bite offers a burst of juicy cherry flavor encased in smooth, velvety chocolate. Perfect for special occasions or just a personal treat, they’re simple to make and will impress everyone at your gathering.

Irresistible Chocolate-Covered Cherry Treats
Ingredients
- 1 cup fresh cherries with stems
- 1 cup semi-sweet chocolate chips
- 1 tablespoon coconut oil or shortening
- Optional: Sea salt for sprinkling
Instructions
- Prepare the Cherries: Wash the cherries and dry them thoroughly. Ensure they have stems for easy dipping.
- Melt the Chocolate: In a microwave-safe bowl, combine the chocolate chips and coconut oil. Microwave in 30-second intervals, stirring in between, until melted and smooth.
- Dip the Cherries: Hold each cherry by the stem and dip it into the melted chocolate, making sure to coat it completely. Let any excess chocolate drip off.
- Set to Cool: Place the chocolate-covered cherries on a baking sheet lined with parchment paper. If desired, sprinkle a tiny pinch of sea salt on top before the chocolate sets.
- Chill: Refrigerate the cherries for about 30 minutes or until the chocolate hardens. Then, serve and enjoy!
Notes
- Fat: 4g
- Protein: 1g
- Carbohydrates: 10g
Gingerbread Marshmallow Pops

Looking for a delightful treat that captures the spirit of the holiday season? These Gingerbread Marshmallow Pops are just what you need! They’re a fun and easy way to enjoy the classic flavors of gingerbread in a handheld form. Perfect for holiday parties or as a sweet gift, these pops are sure to bring smiles to everyone around.
Imagine sinking your teeth into soft marshmallows coated with a spiced gingerbread flavor and drizzled with chocolate. It’s a combination that brings warmth and cheer, making it an instant favorite. Whether you’re serving them at a festive gathering or simply enjoying them at home, these pops are guaranteed to please.

Delicious Gingerbread Marshmallow Pops
Ingredients
- 1 bag of large marshmallows
- 1 cup gingerbread cookie mix
- 8 oz chocolate dark or milk based on preference
- Lollipop sticks
- Sprinkles for decoration
Instructions
- Prepare the Work Area: Line a baking sheet with parchment paper and set aside.
- Coat the Marshmallows: Insert lollipop sticks into each marshmallow, then roll them in gingerbread cookie mix until fully coated.
- Melt the Chocolate: In a microwave-safe bowl, melt the chocolate in 30-second intervals, stirring between each until smooth.
- Dip the Marshmallows: Dip each gingerbread-coated marshmallow into the melted chocolate, letting any excess drip off.
- Add the Finishing Touches: While the chocolate is still wet, sprinkle with festive decorations of your choice.
- Chill: Place the pops on the prepared baking sheet and refrigerate until the chocolate hardens.
Notes
- Fat: 7g
- Protein: 1g
- Carbohydrates: 20g
Peanut Butter Balls Coated in Chocolate

If you’re looking for a sweet treat that combines the irresistible richness of chocolate with the creamy goodness of peanut butter, these chocolate-coated peanut butter balls are calling your name. They are the perfect indulgence for any occasion, whether you’re hosting a party or just need a little pick-me-up during the week.
These little bites of heaven are incredibly easy to make and require no baking. You can whip them up in no time, and they are sure to please everyone from kids to adults. The delightful contrast between the smooth peanut butter filling and the crisp chocolate coating creates a delightful taste experience that’s hard to resist.

Easy and Irresistible Chocolate-Coated Peanut Butter Balls
Ingredients
- 1 cup creamy peanut butter
- 1/2 cup powdered sugar
- 1/2 cup graham cracker crumbs
- 1 teaspoon vanilla extract
- 1 cup semi-sweet chocolate chips
- 1 tablespoon coconut oil or vegetable shortening
Instructions
- Mix Peanut Butter Filling: In a mixing bowl, combine the peanut butter, powdered sugar, graham cracker crumbs, and vanilla extract. Stir until well blended.
- Form Balls: Using your hands, roll the mixture into small balls, about 1 inch in diameter. Place them on a parchment-lined baking sheet.
- Chill: Refrigerate the peanut butter balls for about 30 minutes, or until firm.
- Melt Chocolate: In a microwave-safe bowl, melt the chocolate chips and coconut oil in 30-second intervals, stirring in between until smooth.
- Coat the Balls: Dip each chilled peanut butter ball into the melted chocolate, ensuring it’s fully coated. Return to the parchment-lined sheet.
- Set: Let the chocolate-coated peanut butter balls cool at room temperature or place them in the refrigerator to set the chocolate quickly.
- Serve: Enjoy your chocolate-coated peanut butter balls as a delightful snack or dessert!
Notes
- Fat: 9g
- Protein: 4g
- Carbohydrates: 15g
Raspberry Coconut Candy Bars
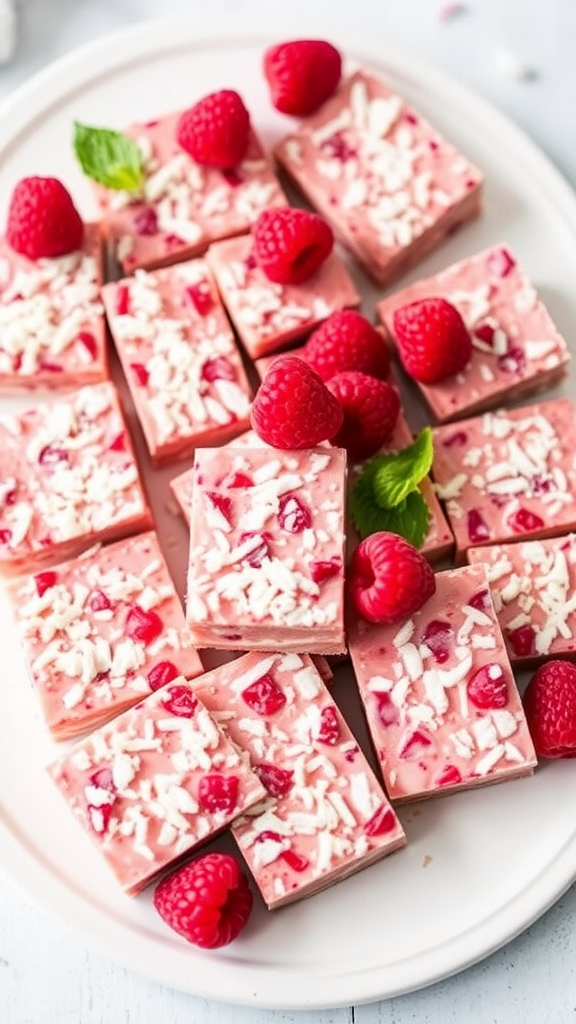
Craving a sweet treat that combines the tartness of raspberries with the tropical flavor of coconut? These raspberry coconut candy bars are your answer. They’re not just a dessert; they’re little bites of joy that will satisfy your sweet tooth in the most delightful way.
Imagine biting into a chewy, flavorful bar filled with vibrant raspberry goodness and a hint of coconut. It’s a treat that’s perfect for sharing or enjoying all by yourself. Plus, the best part is that they are incredibly easy to make! You can whip them up in no time, and they make for an impressive dessert at any gathering.
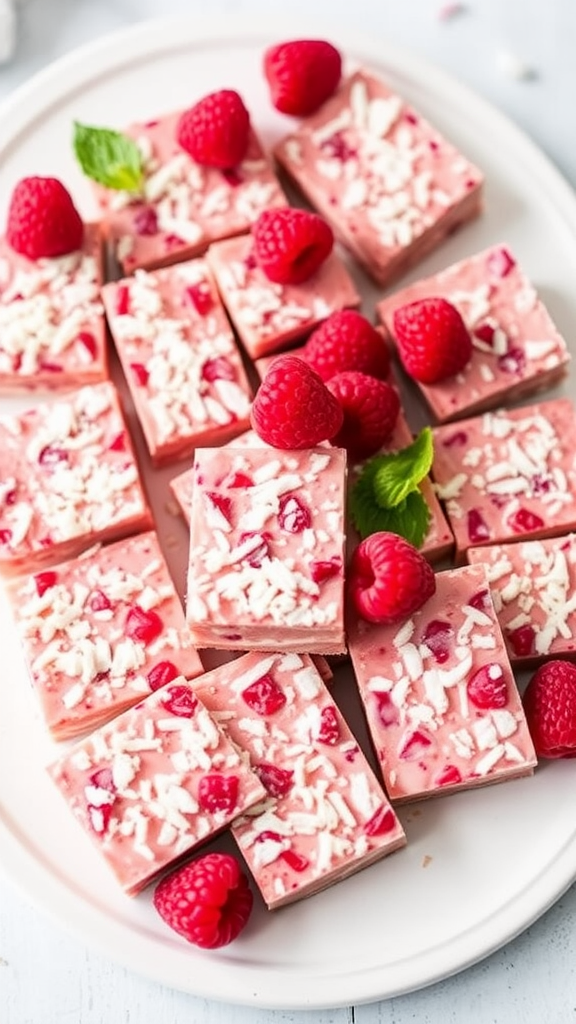
Raspberry Coconut Bars
Ingredients
- 1 cup fresh raspberries
- 1 cup shredded coconut
- 1/2 cup almond flour or coconut flour
- 1/4 cup honey or maple syrup
- 1/4 cup coconut oil melted
- 1 teaspoon vanilla extract
- 1/4 teaspoon salt
- Optional: dark chocolate for drizzling
Instructions
- Preheat the Oven: Begin by preheating your oven to 350°F (175°C) and lining an 8×8 inch baking dish with parchment paper.
- Mix the Ingredients: In a large bowl, combine almond flour, shredded coconut, honey (or maple syrup), melted coconut oil, vanilla extract, and salt. Stir until well combined.
- Add the Raspberries: Gently fold in the fresh raspberries, being careful not to mash them too much.
- Bake: Pour the mixture into the prepared baking dish and spread it evenly. Bake for 20-25 minutes until the edges are lightly golden.
- Cool and Slice: Once baked, allow the bars to cool completely in the pan. Once cool, lift the bars out using the parchment paper, cut into squares or bars, and enjoy. Drizzle with melted dark chocolate if desired.
Notes
- Fat: 8g
- Protein: 2g
- Carbohydrates: 18g
Christmas Sugar Cookie Candies

Looking for a festive treat to brighten up your holiday season? These delightful Christmas sugar cookie candies are the perfect sweet addition to your celebrations. They’re easy to make, fun to decorate, and absolutely delicious. These cookies bring the spirit of Christmas right into your kitchen, making them a must-have for your holiday cookie platter.
Imagine biting into a soft, buttery cookie topped with colorful icing and festive sprinkles. The taste is a wonderful balance of sweet and creamy, with a hint of vanilla that transports you to a winter wonderland.

Easy and Festive Sugar Cookie Recipe
Ingredients
- 2 3/4 cups all-purpose flour
- 1 teaspoon baking soda
- 1/2 teaspoon baking powder
- 1 cup unsalted butter softened
- 1 1/2 cups white sugar
- 1 egg
- 1 teaspoon vanilla extract
- 3 to 4 tablespoons milk
- 2 cups powdered sugar
- 2 tablespoons butter softened
- 1 teaspoon vanilla extract for icing
- Food coloring optional
- Sprinkles for decoration
Instructions
- Preheat the oven to 375°F (190°C).
- In a small bowl, stir together flour, baking soda, and baking powder. Set aside.
- In a large bowl, cream together the butter and sugar until smooth. Beat in the egg and vanilla. Gradually blend in the dry ingredients.
- Roll rounded teaspoonfuls of dough into balls, and place onto ungreased cookie sheets. Flatten each ball slightly with the bottom of a glass.
- Bake 8 to 10 minutes in the preheated oven, or until golden. Let cool on wire racks.
- For the icing, mix powdered sugar, butter, vanilla extract, and milk until smooth. Divide into bowls and tint with food coloring if desired.
- Once the cookies are cool, decorate them with icing and sprinkles. Allow the icing to harden before serving.
Notes
- Fat: 6g
- Protein: 1g
- Carbohydrates: 18g
Chocolate Mint Pretzel Bites
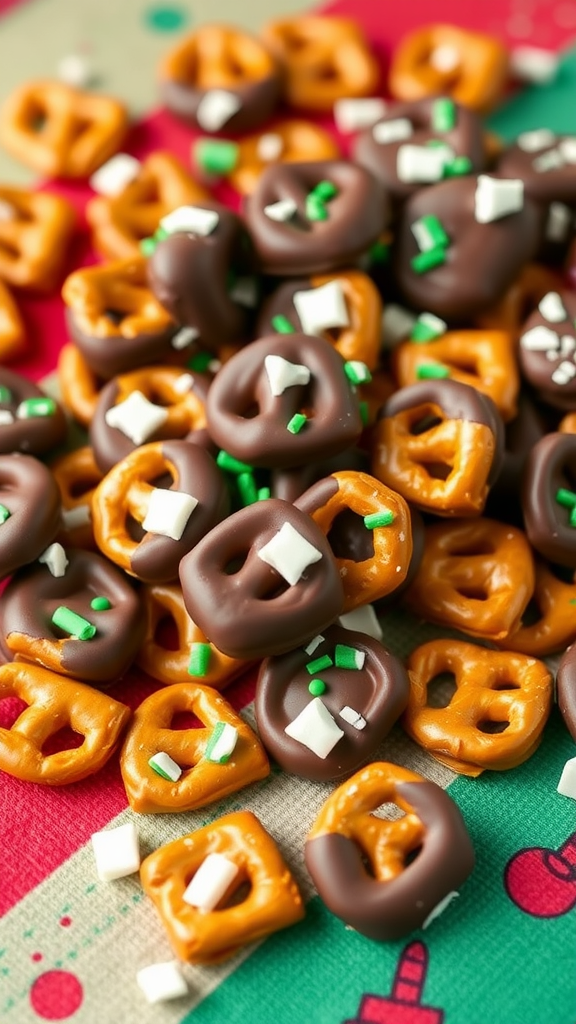
Craving a sweet and salty treat? These chocolate mint pretzel bites are the perfect solution! Combining crunchy pretzels with creamy chocolate and a refreshing hint of mint, they offer a delightful flavor combination that will leave you wanting more.
These bites are not just a snack, they’re a crowd-pleaser! Whether you’re hosting a party or just looking for a quick sweet fix, these treats are easy to whip up and look stunning on any dessert table. Get ready to impress your friends and family with this simple yet delicious recipe.
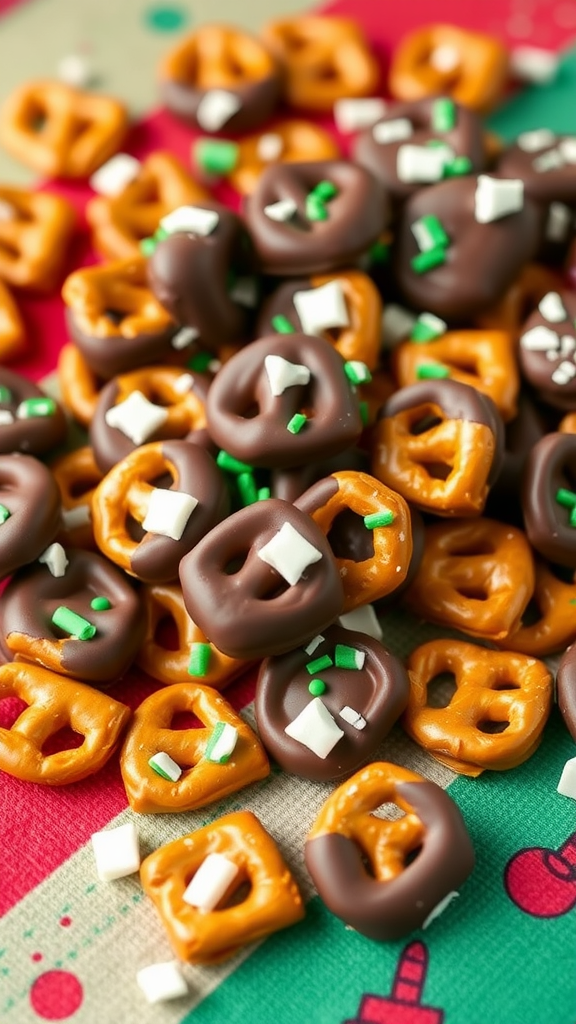
Decadent Chocolate Mint Pretzel Bites
Ingredients
- 1 cup small pretzel twists
- 1 cup chocolate chips milk or dark chocolate
- 1/4 teaspoon peppermint extract
- 1/4 cup crushed peppermint candies or sprinkles for garnish
- Optional: Sea salt for sprinkling
Instructions
- Prepare the Pretzels: Preheat your oven to 350°F (175°C). Arrange pretzels on a baking sheet lined with parchment paper.
- Melt the Chocolate: In a microwave-safe bowl, melt the chocolate chips in 30-second intervals, stirring in between until smooth. Add the peppermint extract and mix well.
- Dip the Pretzels: Using a fork, dip each pretzel into the melted chocolate, allowing excess chocolate to drip off. Place the coated pretzels back onto the baking sheet.
- Garnish: Before the chocolate sets, sprinkle crushed peppermint candies or sprinkles on top. For an extra touch, sprinkle a pinch of sea salt.
- Cool and Serve: Let the pretzel bites cool at room temperature or place them in the fridge for faster setting. Once the chocolate is firm, enjoy your delicious treats!
Notes
- Fat: 6g
- Protein: 1g
- Carbohydrates: 15g
Marshmallow Snowman Treats

Looking for a fun and festive treat to bring some holiday cheer? These delightful marshmallow snowman treats are perfect for kids and adults alike. They are not only cute but also incredibly easy to make, making them a great addition to your holiday celebrations. Whether you’re hosting a party or looking for a fun activity with the family, these snowman treats will surely bring smiles all around.
Imagine a snowy day transformed into a delightful dessert! These marshmallow snowmen are made with fluffy marshmallows, sweet chocolate, and festive decorations, offering a fun and tasty experience. They’re not just treats; they’re little edible crafts that you can personalize however you like!

Easy and Fun Marshmallow Snowman Treats
Ingredients
- Large marshmallows
- Mini marshmallows for the head
- Chocolate melts or white chocolate for coating
- Pretzel sticks for arms
- Candy eyes or chocolate chips for eyes
- Orange candy like gummies or fondant for noses
- Sprinkles or edible glitter for decoration
- Lollipop sticks or skewers optional for serving
Instructions
- Melt the chocolate according to package instructions until smooth.
- Assemble the snowman: Stack two large marshmallows for the body and one mini marshmallow for the head, securing them together with a small amount of melted chocolate.
- Dip the snowman in melted chocolate to coat, and place it on a parchment-lined tray to set.
- While the chocolate is still wet, add candy eyes and an orange candy nose. Use pretzel sticks for arms.
- Decorate with sprinkles or edible glitter as desired.
- Allow the chocolate to set completely before serving.
Notes
- Fat: 4g
- Protein: 1g
- Carbohydrates: 15g
Crispy Rice Treats Shaped as Christmas Trees
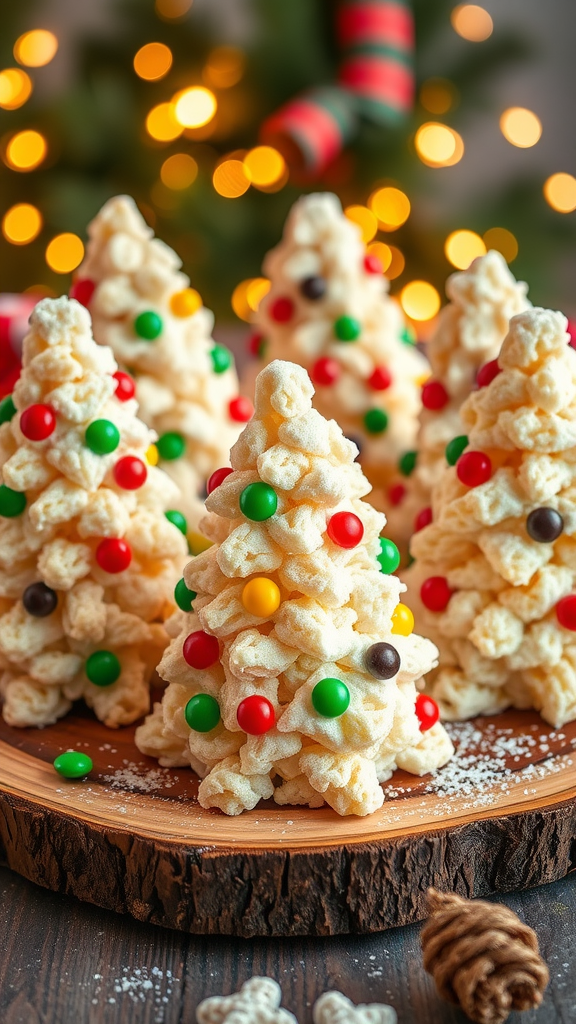
Looking for a fun and delightful way to celebrate the holiday season? These crispy rice treats shaped like Christmas trees are not just a sweet treat; they’re a festive centerpiece that will bring joy to any gathering. Easy to make and fun for the whole family, these treats are perfect for holiday parties or gift-giving.
Imagine a crunchy, marshmallowy dessert that not only tastes amazing but also looks adorable on your dessert table. With a bit of creativity, you can transform traditional rice treats into whimsical Christmas trees that will surely impress your guests. Whether you want to add sprinkles, icing, or edible decorations, the possibilities are endless!
This recipe will take you back to your childhood, as you indulge in the gooey sweetness of marshmallows combined with crispy rice. The combination of textures creates a satisfying crunch that complements the soft marshmallow, making each bite a delightful experience.
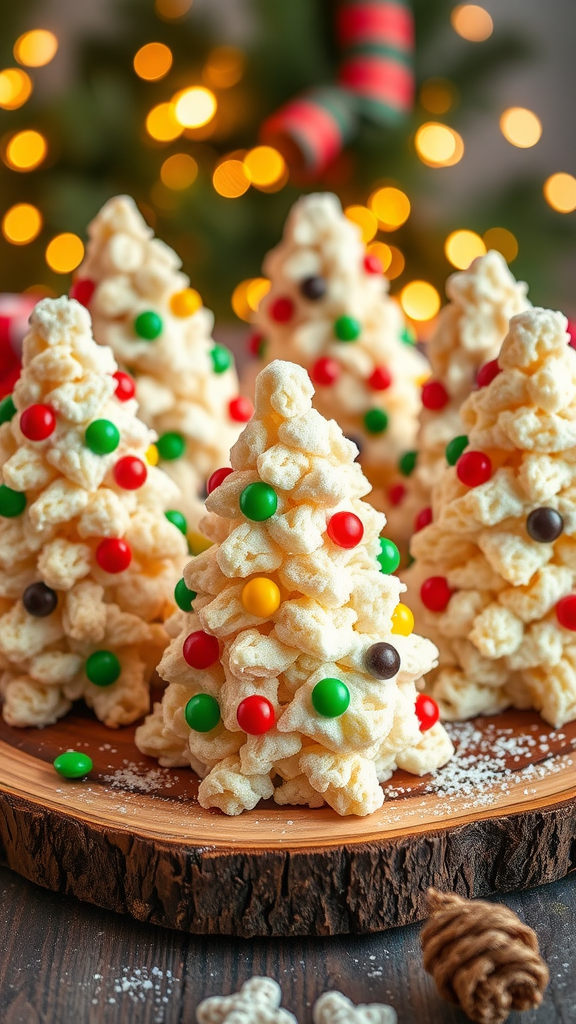
Delicious Christmas Tree Rice Treats Recipe
Ingredients
- 3 tablespoons butter
- 1 package 10 oz mini marshmallows or 4 cups of mini marshmallows
- 6 cups crispy rice cereal
- Green food coloring optional
- Assorted candy decorations e.g., M&Ms, sprinkles, edible glitter
- Powdered sugar for dusting optional
Instructions
- Melt Butter: In a large saucepan, melt the butter over low heat. Add the marshmallows and stir until completely melted and smooth.
- Add Food Coloring: If using, add a few drops of green food coloring to the melted mixture and stir until evenly colored.
- Mix in Cereal: Remove from heat and quickly add the crispy rice cereal. Stir until well coated with the marshmallow mixture.
- Shape the Trees: Allow the mixture to cool slightly. Once it is cool enough to handle, butter your hands and form the mixture into triangular tree shapes. Place them on wax paper to set.
- Decorate: Once the trees are set, decorate them with assorted candy decorations. You can use icing to help the decorations stick.
- Serve: Dust with powdered sugar for a snowy effect, if desired, and serve at room temperature.
Notes
- Fat: 5g
- Protein: 1g
- Carbohydrates: 25g
S’mores Christmas Fudge
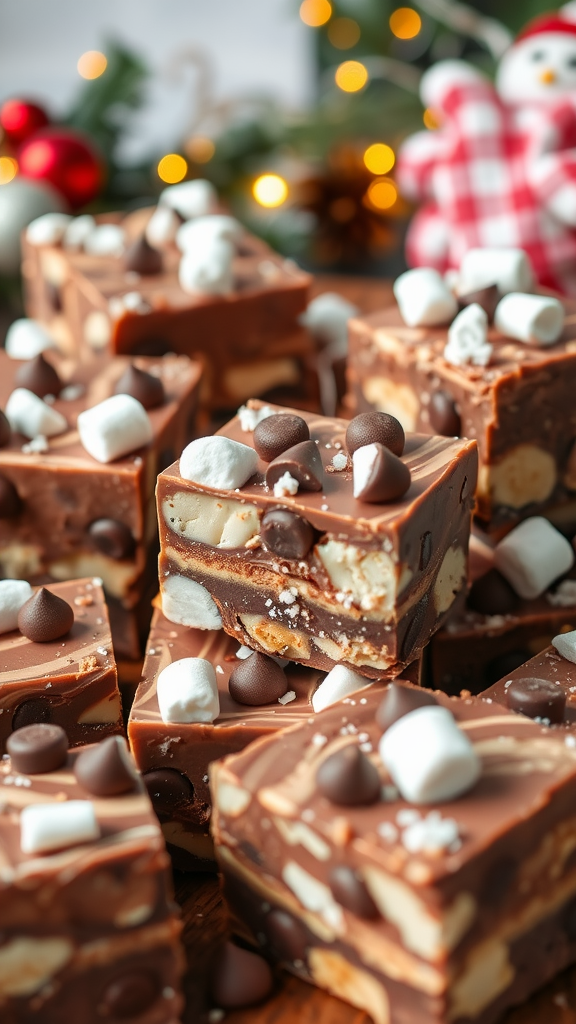
Looking for a sweet treat to brighten up your holiday season? This S’mores Christmas Fudge is a delightful blend of chocolate, marshmallows, and graham crackers that captures the essence of cozy campfire evenings while adding a festive twist. It’s perfect for holiday gatherings, gift-giving, or simply enjoying at home.
Imagine the rich, creamy chocolate melting in your mouth, perfectly balanced by the crunch of graham crackers and the fluffy sweetness of marshmallows. This fudge is not just a dessert; it’s a nostalgic flavor bomb that will have everyone reaching for more.

Deliciously Indulgent S’mores Fudge
Ingredients
- 2 cups semi-sweet chocolate chips
- 1 can 14 oz sweetened condensed milk
- 1 teaspoon vanilla extract
- 2 cups mini marshmallows
- 1 1/2 cups graham cracker crumbs
- 1/2 cup mini chocolate chips for topping
- Additional mini marshmallows for topping
Instructions
- Prepare the Pan: Line an 8×8 inch baking dish with parchment paper, leaving an overhang for easy removal.
- Melt Chocolate: In a medium saucepan over low heat, combine the semi-sweet chocolate chips and sweetened condensed milk. Stir until melted and smooth. Remove from heat and mix in vanilla extract.
- Add Ingredients: Stir in the graham cracker crumbs and mini marshmallows until well combined.
- Spread in Pan: Pour the fudge mixture into the prepared baking dish and spread it evenly. Top with additional mini chocolate chips and mini marshmallows.
- Chill: Refrigerate for at least 2 hours or until firm.
- Serve: Once set, lift the fudge out of the pan using the parchment overhang. Cut into squares and serve.
Notes
- Fat: 10g
- Protein: 2g
- Carbohydrates: 28g
Candied Orange Peel

Candied orange peel is a delightful treat that brings a burst of citrus sweetness to any occasion. This recipe transforms simple orange peels into a chewy, sugary delight that’s perfect for snacking or adding to baked goods. The process is surprisingly easy and requires just a few ingredients you likely already have at home.
Imagine indulging in a piece of candied orange peel, where the zesty flavor mingles with a sugary coating, creating a delightful contrast that’s both refreshing and satisfying. It’s a perfect addition to your holiday gift baskets or even as a gourmet garnish for cocktails.

Homemade Candied Orange Peel Recipe
Ingredients
- 4 large oranges
- 2 cups sugar
- 1 cup water
- Extra sugar for coating
Instructions
- Prepare the Oranges: Wash the oranges thoroughly. Use a vegetable peeler to remove the outer peel, trying to avoid the white pith as much as possible. Cut the peels into thin strips.
- Blanch the Peels: Place the orange peels in a saucepan and cover them with water. Bring to a boil, then drain and rinse the peels. Repeat this process twice to reduce the bitterness.
- Make the Syrup: In the same saucepan, combine 1 cup of water and 2 cups of sugar. Heat over medium heat, stirring until the sugar dissolves.
- Candy the Peels: Add the blanched orange peels to the syrup. Simmer gently for about 45 minutes, or until the peels become translucent.
- Coat the Peels: Remove the peels from the syrup and place them on a wire rack to cool for a few minutes. While still slightly sticky, roll them in extra sugar to coat.
- Dry the Candied Peels: Allow the coated peels to dry completely on the wire rack for several hours or overnight.
Notes
- Fat: 0g
- Protein: 0g
- Carbohydrates: 13g
Spiced Pumpkin Seed Brittle
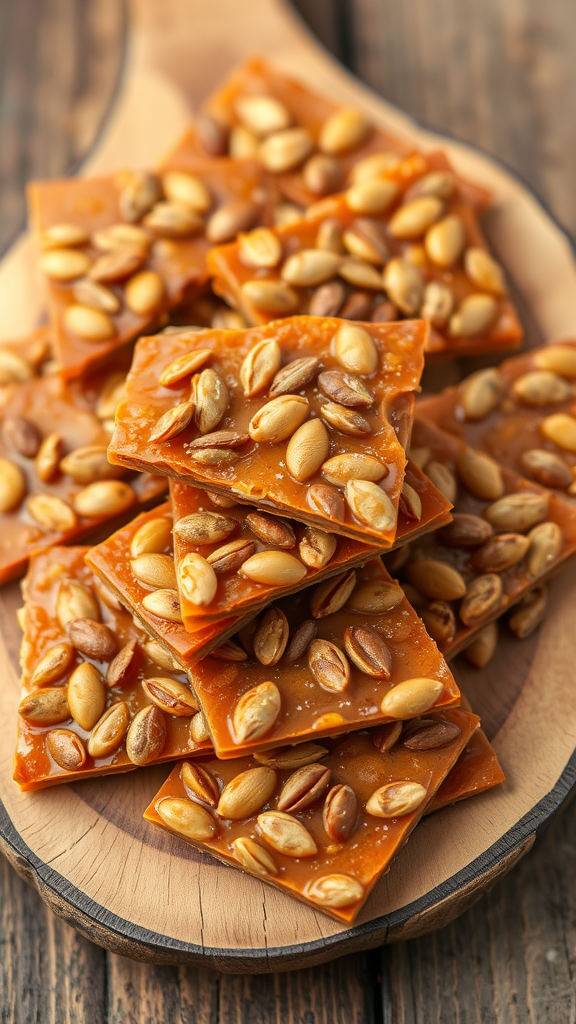
Looking for a delightful snack that combines crunch and spice? This spiced pumpkin seed brittle is the perfect treat for any occasion. Whether you’re hosting a gathering or just craving something sweet and salty, this recipe has you covered.
Imagine sweet, caramelized pumpkin seeds with a hint of warmth from spices, all coming together in a crispy, satisfying bite. It’s the kind of snack that will keep you reaching for just one more piece, making it a popular choice for fall gatherings or holiday celebrations.
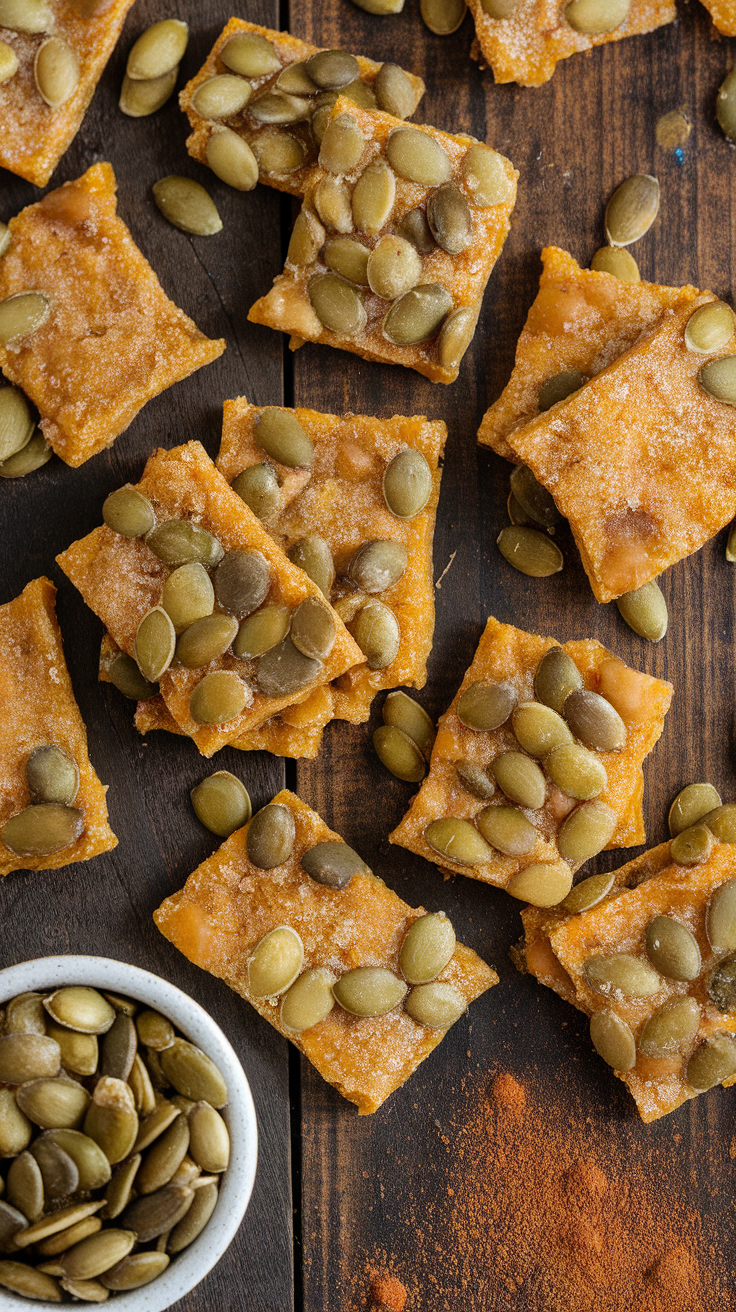
Crunchy Spiced Pumpkin Seed Brittle Recipe
Ingredients
- 1 cup raw pumpkin seeds
- 1 cup granulated sugar
- 1/4 cup water
- 1 tablespoon unsalted butter
- 1 teaspoon vanilla extract
- 1/2 teaspoon cinnamon
- 1/4 teaspoon nutmeg
- 1/4 teaspoon salt
- 1/4 teaspoon cayenne pepper optional for heat
Instructions
- Prepare the Pan: Line a baking sheet with parchment paper or a silicone baking mat. Set aside.
- Cook the Sugar: In a medium saucepan over medium heat, combine the sugar and water. Stir until the sugar dissolves, then stop stirring and let it boil until it turns a light amber color.
- Add Ingredients: Once the sugar has caramelized, remove from heat and quickly stir in the butter, vanilla, cinnamon, nutmeg, salt, and cayenne pepper. Then, immediately add the pumpkin seeds and mix until they’re well coated.
- Spread and Cool: Pour the mixture onto the prepared baking sheet and spread it out evenly. Allow it to cool completely before breaking it into pieces.
- Serve: Once cooled, break the brittle into shards and enjoy your homemade spiced pumpkin seed brittle!
Notes
- Fat: 7g
- Protein: 4g
- Carbohydrates: 28g
Almond Joy Bark
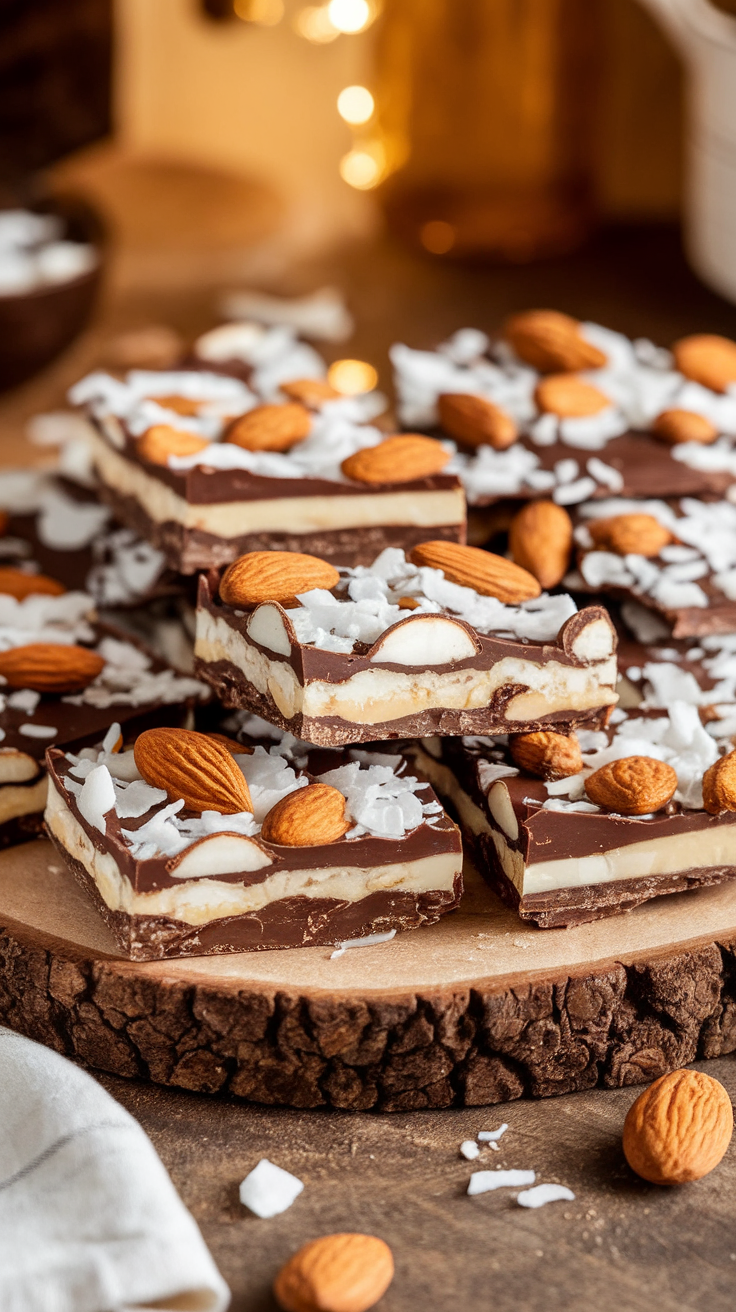
Indulge in a delightful treat that combines the rich flavors of chocolate, coconut, and almonds. This Almond Joy Bark is a simple yet satisfying dessert that will have you reaching for another piece. Perfect for sharing or simply enjoying yourself, it’s a quick way to bring a taste of paradise to your kitchen.
Imagine biting into a smooth layer of chocolate, only to discover a creamy coconut center topped with crunchy almonds. It’s a nostalgic flavor combination that brings joy to every bite. Whether you’re hosting a gathering or just need a sweet fix, this bark is a must-try.

Easy and Irresistible Almond Joy Bark
Ingredients
- 2 cups milk chocolate chips
- 1 cup sweetened shredded coconut
- 1/2 cup sweetened condensed milk
- 1 cup whole almonds toasted
- 1 teaspoon vanilla extract
- 1/4 teaspoon salt
Instructions
- Prepare a baking sheet: Line a baking sheet with parchment paper for easy removal.
- Melt the chocolate: In a microwave-safe bowl, melt the milk chocolate chips in 30-second intervals, stirring until smooth.
- Spread the chocolate: Pour the melted chocolate onto the prepared baking sheet and spread it into an even layer.
- Make the coconut filling: In a separate bowl, mix shredded coconut, sweetened condensed milk, vanilla extract, and salt until well combined.
- Layer the filling: Spoon the coconut mixture over the melted chocolate layer, spreading it evenly.
- Top with almonds: Sprinkle the toasted almonds evenly over the coconut layer, pressing them down slightly.
- Chill: Place the baking sheet in the refrigerator for at least 2 hours or until the bark is set.
- Cut and serve: Once set, break or cut the bark into pieces and enjoy!
Notes
- Fat: 14g
- Protein: 3g
- Carbohydrates: 24g
Hot Chocolate Bombs with Festive Designs

Have you ever wanted to elevate your hot chocolate experience? These hot chocolate bombs are not just treats; they’re a delightful surprise! When you drop them into a cup of steaming milk, they explode into a rich, velvety cocoa mix, complete with marshmallows and festive designs. They make for the perfect holiday gift or a fun activity with friends and family during colder months.
Imagine curling up with a cozy blanket and a warm mug of rich hot chocolate, watching those colorful designs melt away as the chocolate reveals its sweet, comforting contents inside. This recipe not only satisfies your sweet tooth but also brings a smile to every face when they see the magic unfold.

Delicious Hot Chocolate Bombs with Festive Designs
Ingredients
- 1 cup chocolate wafers or melting chocolate
- 1/2 cup hot cocoa mix
- 1/2 cup mini marshmallows
- 1/4 cup crushed peppermint candies optional
- Sprinkles or edible glitter for decoration
- Silicone mold sphere-shaped
Instructions
- Melt the Chocolate: In a microwave-safe bowl, melt the chocolate wafers in 30-second intervals, stirring in between until smooth.
- Coat the Molds: Using a spoon or brush, coat the inside of the silicone molds with the melted chocolate, ensuring an even layer. Let it set for a few minutes, then apply a second coat for a sturdier shell.
- Fill the Bombs: Once the chocolate has set, carefully remove the shells from the molds. Fill half of the shells with hot cocoa mix, mini marshmallows, and crushed peppermint if desired.
- Seal the Bombs: To seal the bombs, gently heat the edges of the empty half-shells on a warm plate until slightly melted, then press them onto the filled half. Allow them to set completely.
- Decorate: Drizzle any leftover melted chocolate over the bombs and sprinkle with festive decorations like sprinkles or edible glitter.
- Serve: To enjoy, place a hot chocolate bomb in a mug and pour hot milk over it. Watch it explode and stir until combined.
Notes
- Calories: 150kcal
- Fat: 8g
- Protein: 2g
- Carbohydrates: 18g
